
In summary:
- Building codes are not suggestions; they are legal requirements based on physics and safety, and ignoring them creates significant liability.
- Common DIY projects like adding outlets, finishing a basement, or building stairs have strict, non-negotiable rules regarding spacing, egress, and dimensions.
- So-called “grandfathered” status on old systems is often voided during major renovations, forcing a full, costly system-wide upgrade to current code.
- The biggest DIY mistakes stem from not understanding the *entire system*—how venting affects plumbing, how wiring gauge affects energy use, or how subfloor prep affects flooring durability.
There’s a unique satisfaction that comes from stepping back and admiring a home improvement project completed with your own two hands. That new bathroom, the finished basement, the updated kitchen—they represent your hard work and vision. But in the excitement of demolition and construction, there’s a silent partner on every job site: the building code. Too many enthusiastic DIYers either don’t know it exists or view it as bureaucratic red tape designed to make their lives harder. They hear the generic advice to “check with the local building department” and dismiss it.
This approach is a recipe for disaster. From an inspector’s standpoint, I’ve seen the consequences: dangerous wiring, structurally unsound stairs, and finished basements that are actually life-threatening fire traps. These aren’t just issues that might incur a fine; they are problems that can void your homeowner’s insurance, lead to personal liability in an accident, and make your home nearly impossible to sell. The code isn’t arbitrary. It’s the documented physics of what makes a home safe, healthy, and efficient.
This guide is different. We’re not just going to list rules. I’m going to walk you through your project from an inspector’s perspective. We’ll look at the common DIY projects that go wrong and, most importantly, explain the ‘why’ behind the requirements. Understanding the science and safety behind the code is the only way to elevate your work from an amateur-hour gamble to a professional-grade investment in your home.
To help you navigate these critical standards, this guide breaks down the most common and costly mistakes DIYers make. We will cover the specific, non-negotiable rules for everything from electrical layouts to material choices.
Summary: A DIYer’s Guide to Building Code Compliance
- Why You Can’t Just Add Outlets Anywhere in a Kitchen Renovation?
- Basement Bedroom Legalities: What Qualifies as a Proper Egress Window?
- The Venting Mistake That Causes Sewer Gas Smells in New Bathrooms
- Rise and Run: Why Your DIY Staircase Might Be Illegal and Dangerous?
- When Do You Lose ‘Grandfathered’ Status on Old Electrical Systems?
- Why Old Wiring Layouts Waste 20% of Your Lighting Energy?
- Porcelain Tile vs Luxury Vinyl: Which Survives Melting Snow Boots?
- Sustainable Materials: How to Choose Non-Toxic Finishes for a Healthy Nursery?
Why You Can’t Just Add Outlets Anywhere in a Kitchen Renovation?
In a modern kitchen, the demand for power is immense. It’s tempting to add outlets wherever you think you’ll need one, but kitchen electrical systems have some of the strictest rules in the entire building code. The reason is simple: kitchens are a wet, high-load environment, creating a dangerous combination of water and high-amperage electricity. Arbitrary placement isn’t just inconvenient; it’s a significant fire and electrocution hazard.
The core of modern kitchen safety is the Ground Fault Circuit Interrupter (GFCI). This device detects minute changes in current and shuts off the power in milliseconds, preventing a deadly shock. It’s no longer a suggestion for outlets near the sink. In fact, 100% of kitchen receptacles now require GFCI protection under the latest National Electrical Code updates. This includes the refrigerator and the garbage disposal, which were previously common exceptions. From an inspector’s view, a missing GFCI is an instant failure.
Beyond GFCI, the code dictates the “what” and “where” to ensure both safety and functionality. These aren’t random numbers; they are based on the typical lengths of appliance cords and expected electrical loads.
- Countertop Spacing: You must have a receptacle within 2 feet of a sink and no more than 4 feet apart along the rest of the countertop. This prevents the dangerous practice of stretching cords across wet areas.
- Dedicated Circuits: Kitchens require at least two dedicated 20-amp circuits for small appliances. This stops you from tripping a breaker every time you run the toaster and coffee maker simultaneously. Standard 15-amp circuits are not sufficient for these high-load areas.
- Island and Peninsula Outlets: Any island or peninsula countertop requires at least one outlet to service it, preventing long, hazardous extension cords from being draped across walkways.
Failing to follow this layout doesn’t just create a hazard; it signals to a buyer’s inspector that the work was unpermitted and unprofessional, potentially derailing a future sale. Getting the layout right is a fundamental mark of quality work.
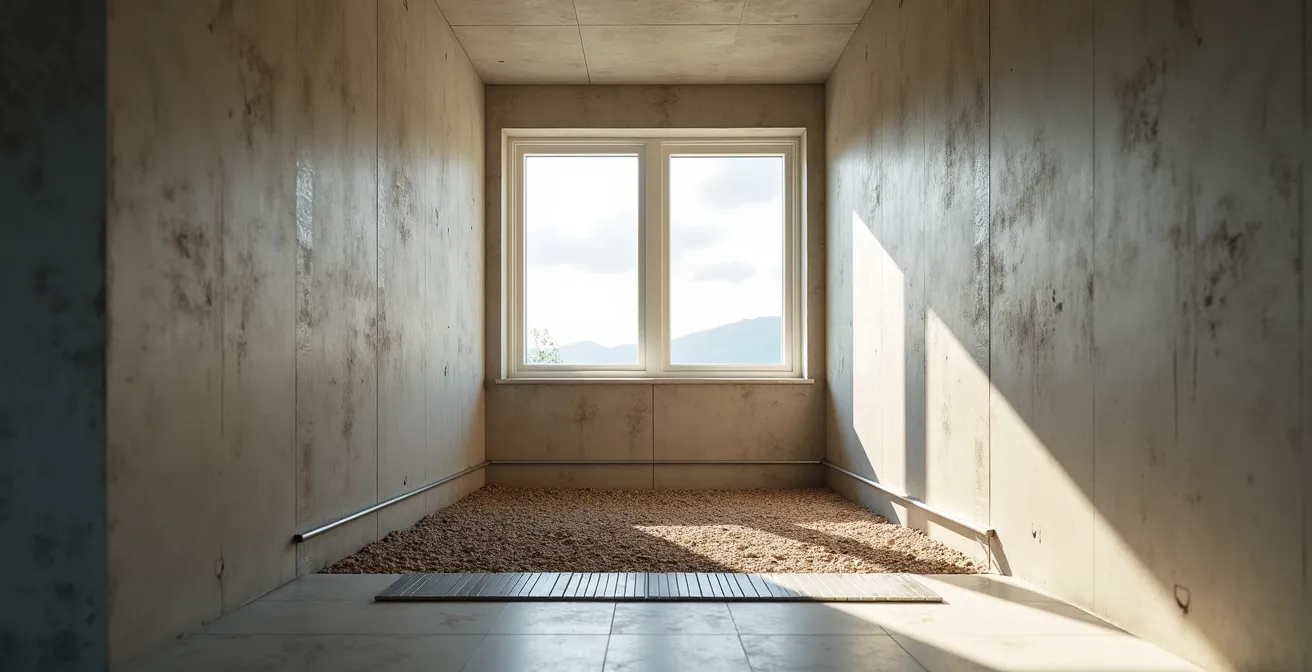
Basement Bedroom Legalities: What Qualifies as a Proper Egress Window?
Converting a basement into a bedroom is one of the most popular DIY projects for expanding living space. It’s also one of the most dangerous when done incorrectly. The single most critical, non-negotiable requirement for a legal and safe basement bedroom is a proper emergency egress. This is not just any window; it is a dedicated escape route and an entry point for firefighters in an emergency.
An egress window must meet strict size and placement requirements. The clear opening must be at least 5.7 square feet (5.0 for ground floor), with a minimum height of 24 inches and a minimum width of 20 inches. The sill of the window cannot be more than 44 inches from the floor. These dimensions are not arbitrary; they are the minimum space needed for a fully-equipped firefighter to enter or for an adult to escape quickly. If the egress opens into a window well, that well must also have a minimum clear area and a permanently affixed ladder if it’s deeper than 44 inches. This ensures the escape route is not a trap.
While these core safety principles are rigid, it’s important to note that building codes do evolve to accommodate new housing types while preserving safety. This demonstrates a key principle: the code’s goal isn’t to prevent innovation, but to ensure that all living spaces, traditional or not, have fundamental safety systems in place.
Case Study: How Building Codes Evolve for New Housing
A prime example of code adaptation is the adoption of Appendix Q in the International Residential Building Code for tiny houses. This appendix provides specific standards for homes under 400 square feet, acknowledging their unique design constraints. It allows for things like compact stairs, reduced headroom in lofts, and modified emergency egress requirements. This shows that codes can be flexible, but the fundamental need for a safe escape route, like an egress window in a basement, is a constant that is never compromised.
As a DIYer, you must understand that simply putting a bed in a basement room does not make it a bedroom. Without a compliant egress, you have created an illegal, uninsurable, and potentially fatal space that adds zero value to your home.
The Venting Mistake That Causes Sewer Gas Smells in New Bathrooms
You’ve just finished your beautiful new bathroom renovation. Everything looks perfect, but there’s a faint, unpleasant smell you can’t trace. A few weeks later, it’s a full-blown sewer gas odor. The cause is almost always an invisible but critical mistake: improper plumbing venting. Every plumbing fixture in your home is connected to a vent pipe that runs up through your roof. This system has two jobs: it allows air to enter the pipes to prevent a vacuum, and it allows sewer gases to safely escape outside.
The key to this system is the “P-trap,” the U-shaped pipe under every sink and drain. That curve is designed to hold a small amount of water, which acts as a physical barrier blocking sewer gas from entering your home. When the vent system is blocked, missing, or improperly installed, flushing a toilet or draining a tub creates a powerful siphon effect. This suction can pull the water right out of the P-traps of nearby fixtures, leaving an open pathway for noxious and potentially explosive methane gas to flow freely into your bathroom. You’ll often hear a gurgling sound from drains as the system struggles for air—a clear warning sign of a venting problem.
This issue is incredibly common in DIY renovations where the focus is on what’s visible, not the complex system within the walls. In fact, a failure to understand system mechanics is a widespread issue, with reports showing that improper attic venting is one of the top 5 building code violations identified by inspectors nationwide. This highlights a pattern: DIYers often neglect the unseen systems that make a home function safely. Another classic mistake is terminating a bathroom fan vent inside the attic instead of running it to the exterior, which just moves moisture and mold problems to a new location.
Your 5-Point Venting System Audit
- Listen for Gurgles: When draining a full sink or tub, listen for gurgling sounds from nearby drains. This is the primary indicator of a blocked or missing vent.
- Check P-Trap Water Levels: After flushing a toilet, check the water level in the P-trap of an adjacent sink or shower. If it has been visibly lowered or sucked out, your vent is not working.
- Verify Fan Exhaust: Confirm that your bathroom exhaust fan terminates outside the house, not in the attic or a soffit. Look for a dedicated vent cap on the roof or an exterior wall.
- Test Airflow (Advanced): A professional can use a smoke test to send harmless smoke up the vent stack on the roof and check for leaks or blockages inside the home.
- Document Before Demo: Before any renovation, take photos and make diagrams of the existing drain and vent lines. Do not assume you can eliminate a pipe just because you don’t know what it does.
Rise and Run: Why Your DIY Staircase Might Be Illegal and Dangerous?
Building a staircase seems like a straightforward carpentry project, but it is a complex intersection of geometry and human biomechanics. Your brain develops a muscle memory for climbing stairs based on the first step. If any subsequent step is a different height, your rhythm is broken, creating a serious trip and fall hazard. For this reason, building codes for stairs are incredibly strict and have almost zero tolerance for variation.
The two key terms are “rise” (the vertical height of each step) and “run” (the horizontal depth of each tread). Code dictates that the rise must be consistent, with a maximum variation of only 3/8 of an inch between the shortest and tallest riser in the entire flight. The tread depth must also be consistent and sufficient for a secure foothold, typically a minimum of 10 inches. Handrails aren’t just decorative; they must be graspable (specific diameter profiles are required) and must return to the wall at the ends to prevent clothing from snagging and causing a fall.
These precise requirements are often missed by DIYers who prioritize aesthetics over function or who make small measurement errors that compound over the length of the staircase. An inspector can spot an illegal staircase from a distance, and it’s one of the most expensive DIY mistakes to fix, often requiring a complete tear-out and rebuild. As a recent analysis of common building code violations shows, the gap between what looks “about right” and what is legally safe is vast.
| Code Requirement | Common DIY Mistake | Safety Risk |
|---|---|---|
| Consistent riser height (max 3/8″ variance) | Inconsistent riser heights | Trip and fall hazard |
| Handrail returns to wall at 90° | Open-ended handrails | Clothing snag hazard |
| Proper tread depth (min 10″) | Insufficient tread depth | Foot slippage risk |
| Graspable handrail diameter | Decorative but ungraspable rails | Unable to prevent falls |
A staircase is not a piece of furniture; it is a core structural and safety component of your home. Treating it with anything less than technical precision is a dangerous gamble with the well-being of everyone who lives in or visits your home.
When Do You Lose ‘Grandfathered’ Status on Old Electrical Systems?
If you live in an older home, you’ve likely heard the term “grandfathered in.” This is a common way of saying that an existing system, like old knob-and-tube wiring, is exempt from current building codes because it was compliant when it was originally installed. While this is true for a static, untouched system, the grandfathered protection is incredibly fragile. It disappears the moment you decide to undertake a significant renovation.
The critical concept to understand is the “50% Rule,” a threshold used in many municipalities. This rule states that if the cost of your renovation project exceeds 50% of the assessed value of the structure, you lose your grandfathered status. At that point, you are legally required to bring the *entire system* up to modern code. For an electrical system, this doesn’t just mean updating the one room you’re working on. It can trigger a mandatory, house-wide rewire—a complex and extremely expensive undertaking. An analysis of residential building codes shows this 50% threshold triggers a mandatory full-system code upgrade and is a common shock for homeowners.

Even small projects can void the protection. Simply extending an old, ungrounded circuit to add a new outlet can be enough for an inspector to require you to update that entire circuit with modern, grounded wiring and arc-fault protection. You cannot simply add new components to an outdated system. This is because old systems lack the fundamental safety features—like a grounding wire—that modern devices and codes rely on. Adding a three-prong outlet to a two-wire system, for example, creates a false sense of security and is a direct code violation.
Before you touch any part of an old electrical system, you must assume that your “grandfathered” status is at risk. A small project can quickly snowball into a five-figure rewiring job if you don’t plan for the code implications from the very beginning.
Why Old Wiring Layouts Waste 20% of Your Lighting Energy?
When renovating, it’s easy to focus on the energy efficiency of the fixtures you install—like new LED bulbs—while completely ignoring the invisible energy vampire in your walls: outdated wiring. Old home electrical systems, often designed with minimal circuits and undersized wires (like 14-gauge), were never intended to handle the number of fixtures and complex controls used today. This outdated layout doesn’t just pose a safety risk; it actively wastes energy.
The problem is a physics principle called “voltage drop.” Electricity loses energy as it travels along a wire, and this loss is converted into waste heat. The longer the wire and the smaller its diameter, the greater the voltage drop. In old homes, a single circuit might snake through multiple rooms to power all the lights, creating excessively long runs. When you replace old incandescent bulbs with a large array of low-power LEDs on that same circuit, the undersized wiring acts as a resistor.
Case Study: The Hidden Cost of Voltage Drop
Building science expert Matt Risinger demonstrates this phenomenon clearly. His technical analysis on retrofitted homes shows how using old 14-gauge circuits to power modern LED arrays, which are optimally designed for 12-gauge wiring, can cause significant energy loss. The undersized wiring effectively chokes the system, converting up to 20% of the energy intended for lighting into useless heat inside the walls. You’re paying for 100% of the electricity, but only getting 80% of the light, while also potentially creating a long-term fire hazard.
A modern, efficient approach involves redesigning the circuit layout with energy zoning in mind. This means creating separate, dedicated circuits for different types of lighting.
- Map Existing Circuits: Identify which outlets and lights are on which circuit. Look for “shared neutrals,” a common issue in old wiring that prevents many smart dimmers and controls from working correctly.
- Create Lighting Zones: Redesign the layout with separate circuits for ambient (general room), task (under-cabinet, reading), and accent (artwork) lighting.
- Install Dedicated Neutrals: Run new circuits with their own neutral wires to ensure full compatibility with modern smart switches and dimmers, which require a neutral to power their own electronics.
Simply swapping bulbs is not an energy efficiency strategy. True efficiency comes from a systems-based approach that matches the wiring to the load, minimizing waste and maximizing performance.
Porcelain Tile vs Luxury Vinyl: Which Survives Melting Snow Boots?
Choosing flooring for an entryway or mudroom is a critical decision, especially in climates with harsh winters. The daily assault of melting snow, abrasive salt, and gritty dirt can destroy lesser materials. The two most popular choices for this high-abuse zone are porcelain tile and luxury vinyl plank (LVP). While both are marketed as durable, their performance under the specific stress of winter conditions varies significantly. The choice is not just about looks; it’s about understanding the material science.
Porcelain tile is inherently superior in resisting the core challenges of winter. It is fired at extremely high temperatures, making it incredibly dense and non-porous. This gives it near-zero water absorption and excellent resistance to “thermal shock”—it won’t crack or expand when a freezing, wet boot creates a puddle on its surface. When paired with a high-performance grout like epoxy, the entire surface becomes a monolithic, waterproof barrier. However, this rigidity is also its weakness: it requires a perfectly flat, stable subfloor, as any flex can cause cracks.
Luxury vinyl plank offers good water resistance for its core, but its seams are its Achilles’ heel. If not installed perfectly, water from melting snow can work its way into the seams and get trapped underneath, leading to mold and subfloor damage. LVP is also softer than porcelain, making it more susceptible to scratching from embedded salt and grit. A detailed professional comparison of remodeling materials confirms that while both are good, their installation system is what defines their success or failure.
| Test Factor | Porcelain Tile | Luxury Vinyl Plank |
|---|---|---|
| Thermal Shock Resistance | Excellent – No expansion/contraction | Moderate – Can expand with heat |
| Salt/Grit Abrasion | Superior with proper sealant | Good but can scratch |
| Water Penetration | Zero with epoxy grout | Core waterproof, seams vulnerable |
| Subfloor Prep Required | Critical for preventing cracks | Critical for preventing gaps |
Ultimately, the debate over which material is better often misses the most important point. As the experts at the Neil Kelly Design Team emphasize, it’s about the entire assembly.
It’s not the material, it’s the system – proper underlayment is more critical for water damage prevention than the flooring itself.
– Neil Kelly Design Team, Professional Remodeling Insights
Whether you choose tile or LVP, a successful, long-lasting installation depends entirely on meticulous subfloor preparation and the use of the correct underlayments and sealants for the job.
Key takeaways
- System Integrity is Everything: A house is a system. A change to plumbing affects venting, a change to wiring affects energy use, and a change to flooring affects the subfloor. You cannot isolate a single component.
- The “Why” Matters More Than the “What”: Don’t just follow a rule; understand the physics behind it. Egress windows are for fire escape, GFCIs are for shock prevention, and stair risers are for muscle memory. Understanding why makes you a better builder.
- “Grandfathered” is a Myth in Practice: Assume any significant renovation will require you to bring affected systems up to modern code. Budget for it, plan for it, and don’t be surprised by it.
Sustainable Materials: How to Choose Non-Toxic Finishes for a Healthy Nursery?
Nowhere is the principle of “doing it right” more important than when preparing a room for a new child. A healthy nursery goes beyond color choices and furniture style; it requires a deep look at the very materials you are bringing into the space. Many standard building materials, from paint and flooring to the glue in new furniture, release harmful chemicals called Volatile Organic Compounds (VOCs) into the air. This “off-gassing” can contribute to poor indoor air quality, which is especially concerning for a newborn’s developing respiratory system.
The key to creating a non-toxic environment is to choose materials with low or zero VOCs and to manage the project timeline to allow for maximum off-gassing before the baby arrives. Your first line of defense is looking for third-party certifications. The most rigorous and respected standard is GREENGUARD Gold. Products with this certification have been tested and proven to have extremely low chemical emissions, making them suitable for sensitive environments like schools and healthcare facilities.
Building a healthy nursery is a matter of careful selection and, crucially, timing. You must plan your renovation to be completed well in advance of your due date to give any residual chemicals time to dissipate. A well-structured timeline is your most effective tool.
- Flooring First (3+ Months Out): Install any new hard-surface flooring, like solid hardwood or certified low-VOC laminate, at least three months before the baby’s arrival. This is the longest off-gassing period.
- Painting (6-8 Weeks Out): Apply low-VOC or zero-VOC paint no later than two months before occupation. Even with these paints, it’s best to keep the room well-ventilated during and after painting.
- Furniture Assembly (4 Weeks Out): Assemble any new furniture, like a crib or dresser, at least one month ahead of time. Place it in a well-ventilated area (ideally not the nursery itself) to air out.
- Final Air Quality Test (1 Week Out): For ultimate peace of mind, you can use a consumer-grade indoor air quality meter to test for VOC levels before moving the baby into the room.
Creating a safe and healthy nursery is the ultimate expression of the inspector’s mindset: it’s about understanding the unseen risks and taking deliberate, methodical steps to mitigate them from the very start.
The journey of a DIY enthusiast is one of continuous learning. The next logical step is not to be intimidated by the code, but to be empowered by it. Before you lift a hammer on your next project, draft a plan that includes a dedicated “code check” for every stage, turning rules from an obstacle into a roadmap for quality.