The secret to flawless alfresco dining lies not in fighting the elements, but in ‘environmental choreography’—subtly directing wind, light, and scent to create an oasis of comfort.
- Strategic barriers (porous hedges, sleek glass) and layered “scent zones” manage wind and pests without sacrificing aesthetics or the view.
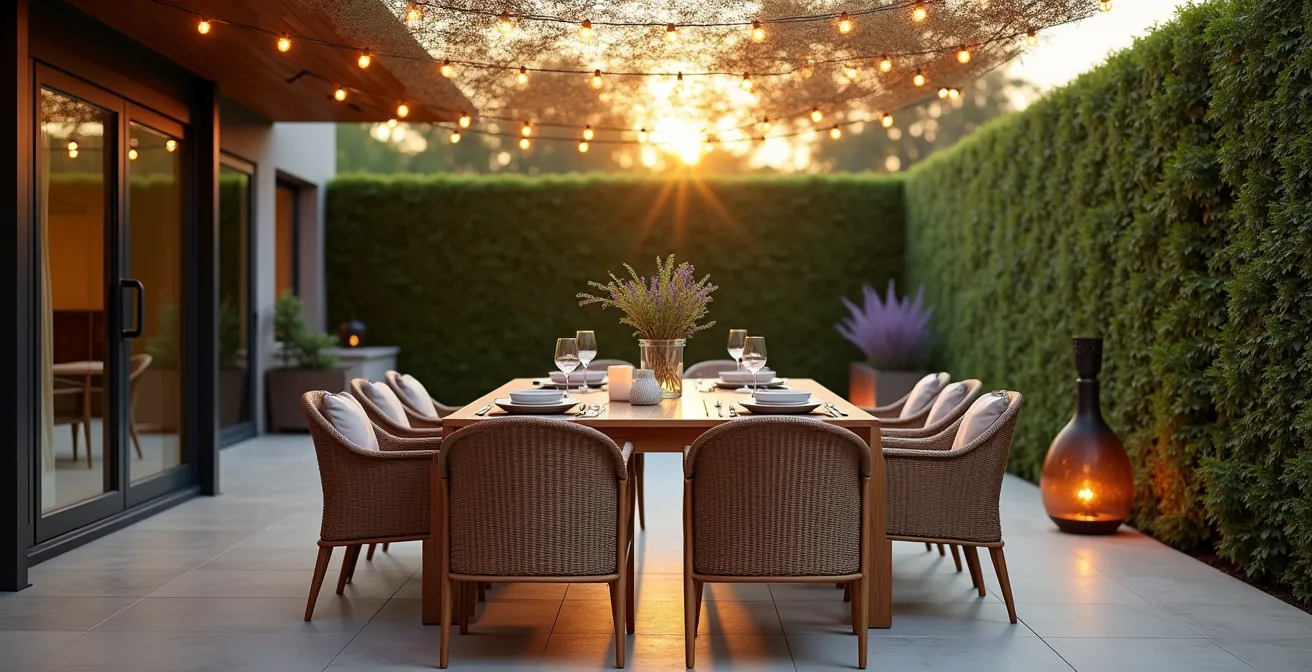
- True intimacy is created with a “perceived ceiling” of low, warm-kelvin lights that also deter up to 80% of flying insects.
Recommendation: Start by performing the ‘Tray Test’ to ensure your dining zone’s layout is functionally seamless, guaranteeing a frictionless hosting experience from kitchen to table.
There’s a special magic to dining under the open sky. The clinking of glasses, the murmur of conversation, the gentle warmth of a setting sun—it’s an experience we all cherish. Yet, how often has that perfect moment been shattered? A sudden, chilling gust of wind that sends napkins flying, or the incessant buzzing of moths dive-bombing the very centerpiece of your table. As hosts who love creating memorable outdoor dinner parties, these discomforts are more than minor annoyances; they are breaches in the hospitality we strive to provide.
The common advice is often reactive and simplistic: put up a bulky umbrella, light a few citronella candles, and hope for the best. While these might offer temporary relief, they rarely solve the underlying problem and often compromise the very beauty of being outdoors. They are brute-force solutions in a situation that calls for finesse. What if the goal wasn’t to fight nature, but to work with it? What if you could subtly shape your environment to make comfort feel inherent and effortless?
This is the core of environmental choreography. It’s a design-led approach that moves beyond basic problem-solving to curate a complete sensory experience for your guests. It’s about understanding the subtle interplay of airflow, light temperature, and even plant-based scents to create a protected, intimate, and truly comfortable alfresco setting. This guide will walk you through the key principles of this sophisticated approach, transforming you from a reactive host into a master of outdoor ambiance.
To help you orchestrate every detail of your outdoor space, we will explore the strategic choices that make all the difference, from structural windbreaks to the psychology of lighting. This structured approach will provide a clear roadmap for creating your perfect alfresco sanctuary.
Summary: A Designer’s Guide to Flawless Alfresco Entertaining
- Glass Screens vs Hedges: Which Blocks Wind Without Killing the View?
- Planting for Pest Control: Do Citronella Plants Actually Work?
- How to Light a Dinner Table Outdoors Without Attracting Moths?
- The ‘Tray Test’: Maximum Distance for a Functional Outdoor Dining Zone
- Teak vs Aluminum: Which Dining Set Can Stay Out All Winter?
- Why Hanging Lights Too High Kills the Intimacy of a Dinner Party?
- The Plumbing Mistake That Freezes Pipes in Outdoor Kitchens
- Solar-Powered LED Path Lights: Which Models Actually Last Through Winter?
Glass Screens vs Hedges: Which Blocks Wind Without Killing the View?
The first act of environmental choreography is managing airflow. An unrelenting wind can chill guests and conversation alike. The choice of barrier, however, dramatically impacts both function and aesthetics. While a solid wall blocks wind, it also creates turbulence and severs the connection to the garden. The sophisticated solution lies in filtration, not obstruction. A porous barrier, like a hedge, is surprisingly effective; research shows that such barriers can reduce wind speed by up to 50% by allowing some air to pass through, which prevents the swirling eddies common with solid walls.
The decision between a natural hedge and a modern glass screen comes down to your primary design goal. Glass panels offer a sleek, contemporary look and, most importantly, preserve an unobstructed view. They are ideal for settings overlooking a stunning landscape or pool. However, they must be kept impeccably clean to avoid marring that view. Evergreen hedges, such as boxwood or yew, offer a softer, more organic boundary. They provide year-round density, contribute to the garden’s ecosystem, and add a layer of natural texture.

Often, the most elegant solution is a hybrid approach. Consider using frameless glass screens to a height of about three or four feet—enough to block wind at seated level—while planting a taller, more robust hedge behind them. This combination delivers the best of both worlds: it maintains the crucial sightline from the dining table while still benefiting from the superior wind-filtering properties and natural beauty of a living barrier. This is environmental choreography in practice: layering solutions for maximum comfort and style.
Planting for Pest Control: Do Citronella Plants Actually Work?
The myth of the single, magical pest-repelling plant is pervasive. Many hosts place a pot of citronella grass on their patio, believing it will create an insect-free zone. The truth is more complex. While the oil from the citronella plant *is* a repellent, the plant itself releases very little of it into the air. You would need to crush the leaves to have any significant effect. Citronella candles are more effective in a contained area, but their protection is limited and can be easily dispersed by a breeze.
True pest management is not about one plant; it’s about creating strategic “scent zones.” This involves a multi-layered planting strategy that confuses and deters insects on a larger scale. It’s about composing a symphony of scents that are pleasant to humans but disruptive to pests. This approach transforms pest control from a chore into an integral part of your garden’s design and fragrance profile.
A Professional’s Strategy for Natural Pest Deterrence
To effectively create these scent zones, experts from Western Exterminator recommend a multi-pronged planting approach tested in the field. Their method involves planting marigolds around the patio’s perimeter as a first line of defense against mosquitoes. Closer to the dining area, clusters of fragrant herbs like rosemary, lavender, mint, and basil create a more concentrated scent barrier. These plants not only deter insects but also provide fresh garnishes for cocktails and dishes. The strategy proves that combining different plant-based deterrents creates a far more robust and reliable protective bubble than any single solution alone.
To maximize this effect, arrange these plants in dense clusters rather than dotting them around individually. The goal is to create overlapping zones of scent. By combining perimeter plants with fragrant herbs near the table and supplementing with essential oil diffusers or torches on the night of the party, you choreograph an environment that is naturally hostile to pests but wonderfully aromatic for your guests.
How to Light a Dinner Table Outdoors Without Attracting Moths?
Improper lighting is the number one culprit for inviting a swarm of winged intruders to your dinner party. Standard incandescent and cool-white LED bulbs emit a broad spectrum of light, including the blue and UV wavelengths that are irresistible to moths and other flying insects. The key to pest-free illumination is not less light, but the *right kind* of light. This is where understanding light temperature, measured in Kelvin (K), becomes a powerful tool for the outdoor host.
The solution is to use warm, yellow-toned light sources. Research confirms that LED lights below a 3000K Kelvin temperature attract 80% fewer flying insects than their cooler counterparts. Bulbs labeled as “warm white,” “soft white,” or amber are your best allies. This simple switch allows you to sufficiently illuminate your space without sending an open invitation to every bug in the neighborhood.

Beyond bulb choice, a sophisticated lighting plan involves a three-layer strategy to create both ambiance and functionality.
- Task Layer: This is the most important light, focused directly on the dining table. A shielded pendant light or a cluster of them, hung 30-36 inches above the table surface, provides clear, direct illumination for dining without causing glare. Using warm amber or yellow bug lights here is critical.
- Ambient Layer: This layer creates the overall mood. String lights with warm-toned bulbs, hung at a height of 7-8 feet, define the space and add a festive glow without being the primary insect attractant.
- Accent Layer: Use uplighting to highlight surrounding trees, architectural features, or garden sculptures. By positioning these lights away from the immediate dining area, you draw the eye, create a sense of depth, and strategically lure any persistent insects away from your guests.
This layered approach ensures your table is the well-lit focal point, while the surrounding environment is softly and strategically illuminated.
The ‘Tray Test’: Maximum Distance for a Functional Outdoor Dining Zone
An often-overlooked aspect of alfresco design is the ergonomics of hosting. A beautiful dining spot loses its charm if it requires a Herculean effort to serve the meal. The “Tray Test” is a simple, practical principle to ensure your outdoor dining zone is an extension of your home, not a remote outpost. The concept is straightforward: how easy is it to walk from your kitchen to the dining table carrying a full tray of food or drinks? The ideal path should be short, clear, and require minimal navigation.
As a rule of thumb, professional designers recommend a distance of 15-20 steps with no more than one door to navigate between the kitchen and the outdoor table. This creates a low-friction hosting experience, allowing you to spend more time with your guests and less time on logistics. A path that is too long, winds through complex garden beds, or involves multiple steps increases the risk of spills and turns serving into a stressful task.
The distance from your primary food preparation area directly dictates the amenities your outdoor dining zone will require to remain functional. A nearby patio may need nothing more than good lighting, while a “destination” dining spot at the far end of the garden becomes a much larger project. The following table breaks down this relationship, helping you plan for a truly seamless experience.
| Distance from Kitchen | Functionality Score | Best Use Case | Required Amenities |
|---|---|---|---|
| 0-15 steps | Excellent (9/10) | Daily dining, frequent entertaining | Basic lighting only |
| 15-30 steps | Good (7/10) | Weekend dining, planned events | Serving station recommended |
| 30-50 steps | Moderate (5/10) | Special occasions | Outdoor kitchen essential |
| 50+ steps | Challenging (3/10) | Destination dining only | Full outdoor kitchen required |
Ultimately, passing the “Tray Test” ensures that the joy of outdoor dining is not diminished by the practical challenges of getting the meal to the table. It prioritizes the host’s comfort, which is a cornerstone of genuine hospitality.
Teak vs Aluminum: Which Dining Set Can Stay Out All Winter?
Selecting an outdoor dining set is about more than just aesthetics; it’s a long-term investment in durability and guest comfort. Two of the most popular materials, teak and aluminum, offer vastly different performance profiles, especially when faced with the challenges of wind, winter, and pests. The right choice depends on your climate and how you intend to use and store your furniture.
Teak is a dense, heavyweight hardwood rich in natural oils. This makes it exceptionally resistant to both rot and insect infestation. Its sheer weight is a significant advantage in windy locations; a substantial teak chair is unlikely to be toppled by a sudden gust. Aluminum, by contrast, is lightweight and easy to move, but this makes it highly susceptible to being blown around unless it is anchored or stored. Furthermore, the thermal comfort of these materials is a key hospitality factor. On a cool evening, an aluminum chair will feel cold to the touch, while teak remains relatively neutral. Conversely, in direct sun, aluminum can become uncomfortably hot.
When it comes to winter durability, both materials have their strengths, but require different considerations. A powder-coated aluminum frame is rust-resistant, but scratches can compromise the coating and lead to corrosion. Its hollow tubes can also become unwelcome homes for spiders and other insects over the winter. Teak, if left untreated, will weather to a silvery-grey patina and can endure decades outdoors. An annual oiling will maintain its original honey color and bolster its natural defenses.
| Factor | Teak | Aluminum |
|---|---|---|
| Wind Resistance | Excellent (heavy, stable) | Poor (lightweight, needs anchoring) |
| Thermal Comfort | Good (low heat conductivity) | Poor (gets very hot/cold) |
| Winter Durability | Excellent with oil treatment | Good but may corrode |
| Pest Resistance | Natural oils repel insects | Hollow tubes can harbor spiders |
| Maintenance Required | Annual oiling | Minimal cleaning |
For a host prioritizing a “set it and forget it” approach with year-round stability and natural pest resistance, teak is the superior, albeit more expensive, choice. Aluminum offers modern lines and lower maintenance but requires more active management in windy conditions and presents greater thermal comfort challenges.
Why Hanging Lights Too High Kills the Intimacy of a Dinner Party?
Lighting does more than just illuminate; it defines a space. In an open outdoor environment, light is your most powerful tool for creating a sense of enclosure and intimacy. When string lights or pendants are hung too high (e.g., 10 feet or more), they illuminate the entire patio area, making the space feel vast and undefined. The light is scattered, the atmosphere is diluted, and your guests can feel exposed and disconnected. You’ve lit the space, but you’ve failed to create a “room.”
The secret to fostering connection and conversation is to create what designers call a “perceived ceiling.” By lowering your primary light source, you create a pool of warm light that acts as a psychological boundary. This visual cue transforms an open expanse into a cozy, intimate setting. As design authorities note, this simple adjustment has a profound effect on guest behavior.
A lower light source at 7-8 feet creates a perceived ‘ceiling’, making an open outdoor space feel like a cozy, intimate ‘room’ and encouraging closer conversation
– HGTV Design Experts, HGTV Outdoor Spaces Guide
This lower light source makes the dining table the undeniable heart of the evening. It focuses attention, softens features, and encourages guests to lean in, fostering a more personal and engaging atmosphere. The darkness outside this “light room” recedes, enhancing the feeling of being in a special, secluded sanctuary. To achieve this effect with precision, follow a clear plan.
Your Action Plan: Creating the Perfect Light Pool
- Assess the Dining Footprint: Measure your table’s dimensions and add approximately 12 inches on each side to define the ideal size for your pool of light.
- Set the Primary Fixture Height: Position your main task lighting (like a pendant) so it hangs 30-36 inches above the table surface for optimal, glare-free illumination.
- Install Dimmers for Control: Always install dimmers on your outdoor lighting. This allows you to adjust the intensity throughout the evening, aiming for a soft 3-5 foot-candles at table level for a comfortable dining ambiance.
- Define the Perimeter: Add secondary accent lights, such as string lights or uplights, at a height of 10-12 feet to gently define the larger space without overwhelming the intimate zone you’ve created over the table.
- Integrate and Test: Turn on all layers of light and observe from a seated position. Ensure the task light is sufficient for dining and the ambient layers create depth without pulling focus from the table.
The Plumbing Mistake That Freezes Pipes in Outdoor Kitchens
An outdoor kitchen elevates alfresco dining from a single meal to a complete culinary experience. However, the convenience of an outdoor sink can quickly turn into a costly disaster if the plumbing is not designed with winter in mind. The single most common and damaging mistake is improper drainage. Many DIY installations or even inexperienced contractors fail to ensure that every drop of water can be fully evacuated from the system before the first freeze.
Water left trapped in pipes will expand as it freezes, exerting immense pressure that can easily rupture copper or PVC lines, leading to expensive repairs come spring. Proper winterization is not just about shutting off a valve; it’s about a system designed from the ground up to be completely drainable. This involves three critical elements that are often overlooked but are standard practice for professional installers.
Case Study: A Professional Winterization Protocol
A professional installation guide for outdoor kitchens highlights a three-step protocol to prevent frozen pipes. First, every horizontal water line must be installed with a continuous, slight downward slope of at least 1/4-inch per foot towards a single low-point drain. There can be no dips or “bellies” where water can pool. Second, a dedicated and accessible blowout port must be installed, allowing a standard air compressor to be connected to force out any residual water trapped in the lines. Finally, the placement of the shut-off valve is crucial. It must be located inside the heated envelope of the house, and the pipe segment between this valve and the outdoor faucet must itself be fully drainable. This means after closing the indoor valve, the outdoor faucet must be opened to let that final section empty completely.
To further safeguard your investment, always use frost-proof faucets rated for your climate zone and insulate any exposed pipes with high-quality, closed-cell foam insulation designed for outdoor use. By focusing on a system that is 100% drainable by design, you eliminate the risk of ice damage and ensure your outdoor kitchen is ready for action as soon as the weather warms.
Key takeaways
- True comfort comes from ‘environmental choreography’—proactively shaping your space’s microclimate, not just reacting to problems.
- Layering is key: use layered scent zones for pest control, layered lighting for ambiance, and layered barriers for wind management.
- Hospitality is in the details: consider the thermal comfort of furniture and the ‘frictionless hosting’ ensured by the Tray Test.
Solar-Powered LED Path Lights: Which Models Actually Last Through Winter?
Well-placed path lighting is a crucial element of safety and ambiance, guiding guests from the house to your dining area. Solar-powered LED lights offer an eco-friendly and easy-to-install solution, but their performance can vary dramatically, especially during the shorter, cloudier days of winter. Many cheaper models fail when you need them most, leaving your paths dark and treacherous. The key to reliable, year-round solar lighting is investing in models with superior technical specifications built for low-light and cold-weather performance.
The first factor is the solar panel itself. Monocrystalline panels are about 20% more efficient in low-light conditions than their cheaper polycrystalline counterparts, giving them a distinct advantage in winter. The second critical component is the battery. Look for models with a high-capacity lithium battery of at least 1200mAh. These batteries hold a longer charge and perform better in cold temperatures. According to outdoor lighting specialists, solar lights with an IP65+ rating and high battery capacity can maintain over 70% of their performance even in winter.
Finally, build quality is non-negotiable for winter survival. An IP65 or higher weatherproof rating ensures the housing can resist ingress from snow, ice, and rain. The housing material itself is also vital; opt for durable cast aluminum or stainless steel over plastic, which can become brittle and crack in freezing temperatures. When selecting and placing your lights, don’t just think about summer sun. Test their position in late fall to ensure they receive the maximum amount of direct midday sunlight available during the winter solstice for your location. This foresight ensures your investment in safety and ambiance pays off all year long.
By applying these principles of environmental choreography, you transform your outdoor area from a simple patio into a curated dining destination. The next logical step is to begin assessing your own space through this new lens, starting with the most fundamental element: a seamless flow for you, the host.