Achieving a true indoor-outdoor connection in a small suburban home is a spatial engineering challenge, not a decorating project.
- The physical threshold between inside and out is the single biggest barrier to seamless flow and must be completely eliminated.
- Extending the usability of your patio beyond summer requires strategic investments in all-weather coverage and multi-zone heating.
Recommendation: Focus first on solving the functional barriers—thresholds, weather, privacy, and seasons—before considering aesthetics to truly expand your living space.
For many suburban families, the backyard is a tantalizing but separate world. You may have large glass doors and matching patio furniture, yet the space feels disconnected, an afterthought rather than a true extension of your living room. The common advice—use consistent flooring, add an outdoor rug—often misses the fundamental point. These are cosmetic fixes that fail to address the architectural barriers creating the separation.
The true art of creating seamless indoor-outdoor flow lies not in decoration, but in spatial engineering. It requires thinking like an architect and systematically dismantling the physical and psychological barriers of your home’s building envelope. The goal is to transform a simple wall with a door into a permeable, inviting membrane, effectively creating a single, unified living volume that adapts to your family’s needs throughout the year. This is about more than just opening up to the garden on a sunny day; it’s about achieving genuine four-season activation of your entire property.
This guide will move beyond the platitudes and provide an architect’s perspective on solving the core challenges. We will dissect the critical transition points, evaluate the most effective solutions for weather protection and season extension, and explore sophisticated strategies for creating privacy without building a fortress. By focusing on these functional foundations, you can unlock the full potential of your small suburban home and truly live in your garden.
To help you navigate these architectural considerations, this article is structured to address the most critical questions one by one. Explore the sections below to understand how to methodically transform your home’s connection to the outdoors.
Summary: A Guide to Engineering Indoor-Outdoor Living
- Flush Thresholds: How to Eliminate Trip Hazards Between House and Patio?
- Pergola vs Retractable Awning: Which Offers Better Rain Protection?
- Fire Pit vs Infrared Heaters: Which Extends the Patio Season Longer?
- How to Block the Neighbor’s View Without Building a Fortress?
- The Plumbing Mistake That Freezes Pipes in Outdoor Kitchens
- Broken Plan vs Open Plan: Which Suits a Family with Teenagers Better?
- Glass Screens vs Hedges: Which Blocks Wind Without Killing the View?
- Landscaping for ROI: Which Exterior Upgrades Increase Home Value Most?
Flush Thresholds: How to Eliminate Trip Hazards Between House and Patio?
The single most significant barrier to seamless flow is not the door itself, but the threshold beneath it. A raised sill, even a small one, creates a physical and psychological disconnect. It says “you are now going outside.” True integration is achieved through meticulous attention to threshold ergonomics, aiming for a completely flat, trip-free transition. This isn’t just an aesthetic choice; it’s a fundamental principle of universal design, so much so that building codes are mandating it. For example, regulations in the UK now require that 100% of new build housing in the UK must have level thresholds for accessibility.
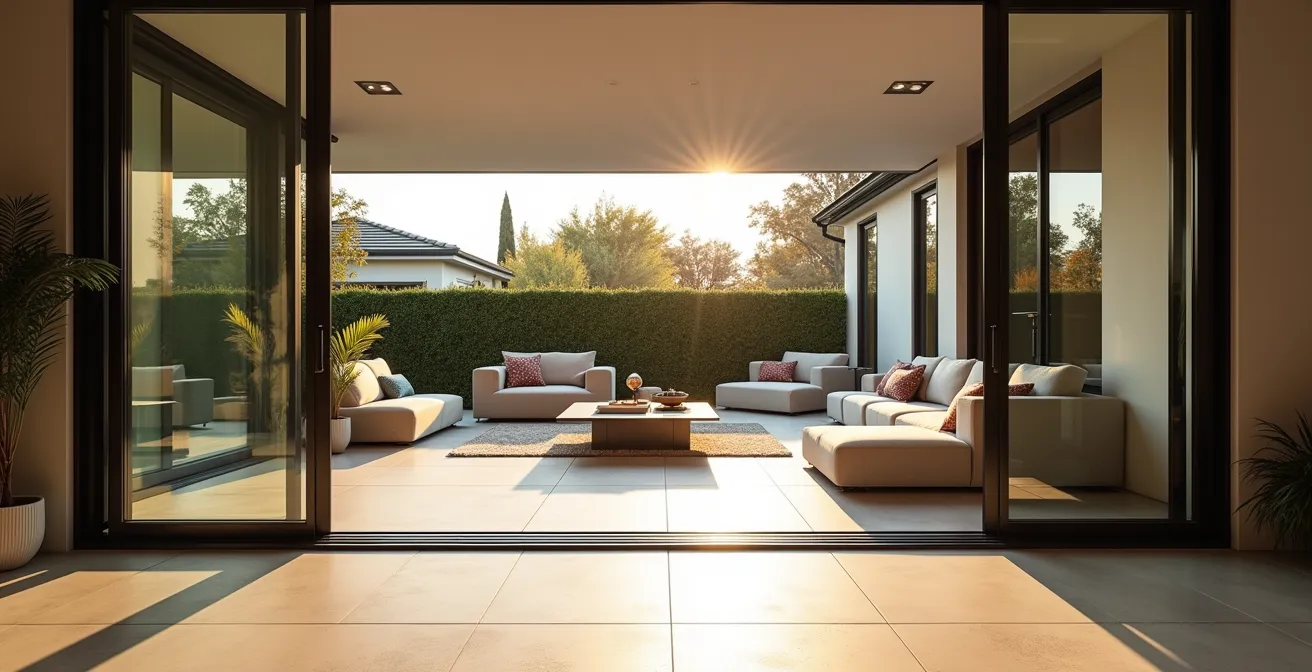
Achieving this requires specific door systems and installation techniques designed to manage weather without a raised barrier. The illustration below shows the ideal: flooring material continues uninterrupted from the interior to the exterior, with drainage cleverly hidden within the door’s frame system. This creates an effortless visual and physical path, encouraging movement between the two zones.

As you can see, the feeling of a single, expansive floor plane is powerful. The choice of door system is critical to achieving this effect. Traditional sliding doors often have high sills to prevent water ingress, making them a poor choice for seamless flow. Modern systems, however, are engineered specifically for this purpose.
The following table outlines how different door systems handle the threshold challenge. Notice how recessed and lift-and-slide systems are specifically designed to offer a flush transition by integrating advanced drainage and sealing solutions, making them the superior architectural choice for unifying indoor and outdoor spaces.
| Door Type | Standard Height | Flush Option | Weather Protection Method |
|---|---|---|---|
| Traditional Sliding | 45-50mm step | Not available | Raised frame prevents water ingress |
| Recessed Aluminium Sliding | Zero variation | Fully flush | Integrated channel drains (AS 2047 compliant) |
| Lift-and-Slide | 25mm when closed | Flush when open | Compression seals + drainage |
| Bi-fold with Low Threshold | 15-20mm | Near-flush | Weather-rated seals + slope |
Pergola vs Retractable Awning: Which Offers Better Rain Protection?
Once you’ve perfected the threshold, the next barrier to creating a true outdoor room is weather. A patio that’s unusable in light rain or harsh sun is a part-time space, not a genuine living area extension. While retractable awnings offer good sun protection, they often fall short during a downpour, needing to be retracted to avoid damage. For reliable, four-season activation, a more robust structure is required. Modern pergolas, particularly bioclimatic models with louvered roofs, represent a significant leap forward in this regard.
These systems are far more than simple shade structures. As highlighted by industry professionals, modern aluminum louvered pergolas are engineered to provide complete rain protection. When closed, their interlocking louvers form a watertight roof. An integrated gutter and downspout system, often hidden within the support posts, effectively channels rainwater away, keeping the space below perfectly dry. This durability and all-weather performance are key reasons why the bioclimatic pergola market is experiencing significant growth, as homeowners seek more permanent and functional outdoor solutions.
Unlike fabric awnings that can sag or get damaged, the rust-resistant aluminum construction of these pergolas ensures long-term durability against sun, rain, and wind. This makes them a superior investment for anyone serious about creating an outdoor space that functions as a reliable room, regardless of the weather forecast. They provide the certainty needed to invest in quality outdoor furniture, rugs, and electronics without fear of water damage.
Fire Pit vs Infrared Heaters: Which Extends the Patio Season Longer?
Creating a four-season outdoor room means conquering the cold. While a fire pit offers a wonderful social centerpiece, its convective heat (warming the air) is inefficient and often insufficient for truly extending the patio season into chilly evenings or cooler months. For reliable and targeted warmth, radiant infrared heaters are the architect’s choice. They work like the sun, emitting infrared waves that directly warm objects and people in their path, not the surrounding air. This makes them far more effective in open or breezy conditions.
The key difference lies in the type of heat and its application. A fire pit creates a single, warm “huddle point,” while wall-mounted infrared heaters can create broad, functional “zones” of warmth, such as over a dining table or a seating area. For a small suburban yard, this is a much more efficient use of space.
| Feature | Fire Pit | Infrared Heater |
|---|---|---|
| Space Required | 10ft clearance radius | Zero floor space (wall-mounted) |
| Heat Type | Convective (campfire warmth) | Directional line-of-sight |
| Fuel Storage | Propane tanks or wood storage | Professional electrical installation |
| Weather Restrictions | Subject to burn bans | No restrictions |
| Social Impact | Creates gathering focal point | Background heating |
For maximum season extension, a hybrid approach often works best: use efficient infrared heaters for primary, task-oriented warmth and a gas fire table as a secondary heat source and social focus. This allows you to create a comfortable environment for dining on a cool autumn night while still enjoying the ambiance of a flame. A well-designed heating strategy is what truly transforms a patio from a summer-only spot to a year-round destination.
Action Plan: Heating Zone Strategy for Maximum Season Extension
- Install wall-mounted infrared heaters for primary task-oriented warmth in dining areas.
- Position heaters at a 7-8 feet height for optimal heat distribution without floor obstruction.
- Add a gas fire table as a secondary heat source for social gathering zones.
- Create wind barriers using glass screens or strategic plantings to retain heat.
- Use timer controls to pre-heat spaces 15-20 minutes before use.
How to Block the Neighbor’s View Without Building a Fortress?
Privacy is essential for an outdoor space to feel like a room, but in small suburban yards, the default solution—a tall, solid fence—can create a boxed-in, oppressive feeling. The architectural approach is not to build walls, but to practice strategic sightline control. This means identifying the specific angles of view you need to block (e.g., a neighbor’s second-story window) and using layered, semi-transparent elements to interrupt that view without sacrificing light and airiness.
Professional landscapers achieve this with a layered planting technique. Instead of a single, monolithic hedge, they combine tall, slender plants like ‘Sky Pencil’ Holly in the back row with shorter, wider shrubs in front. This creates a visually deep and effective screen that feels natural, not confining. For yards with a minimal footprint, vertical greening on trellises with evergreen climbers like Star Jasmine provides excellent privacy while adding fragrance and beauty. The goal is to create a sense of enclosure and seclusion, not isolation.
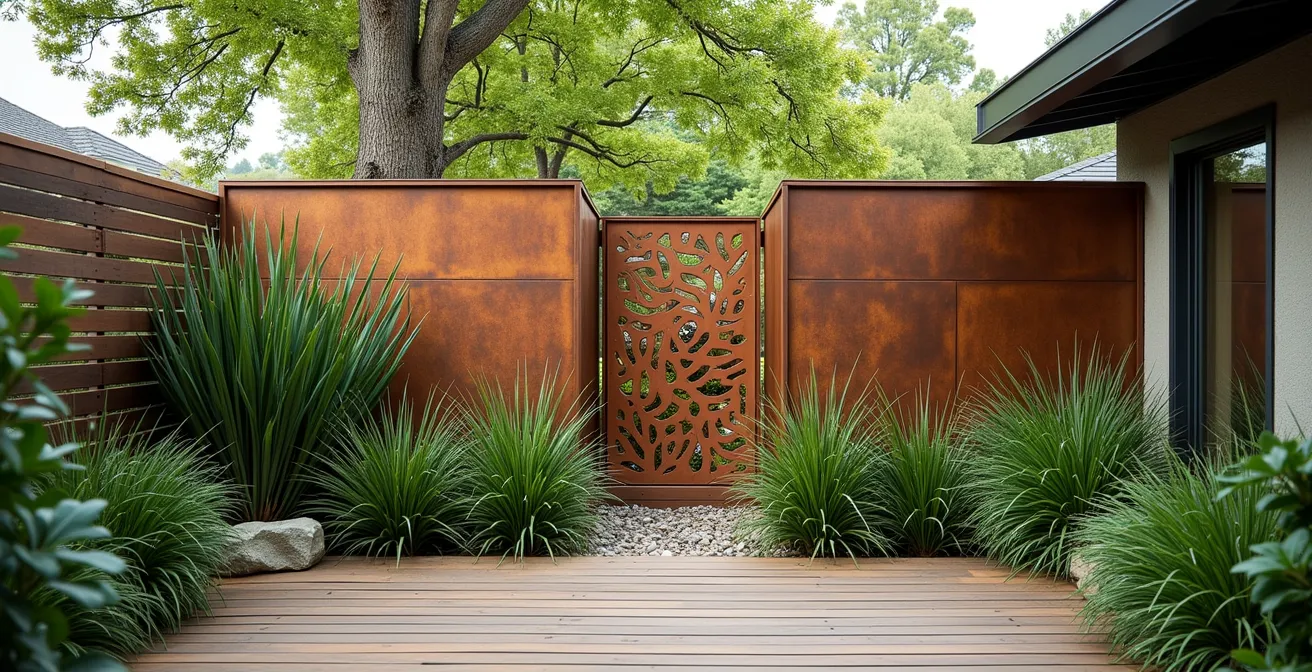
Beyond plants, structural elements can provide privacy with architectural flair. Laser-cut Corten steel screens offer a filtered view while casting beautiful shadows. Horizontal slatted hardwood panels can be spaced to block direct sightlines while allowing light and air to pass through. Even a bubbling water feature can contribute by creating “acoustic privacy,” masking conversations from nearby neighbors. The key is to think in layers and textures, creating a rich tapestry that blocks views strategically rather than building an imposing perimeter wall.
The Plumbing Mistake That Freezes Pipes in Outdoor Kitchens
An outdoor kitchen can be the ultimate feature for an indoor-outdoor lifestyle, but it comes with a significant technical challenge: protecting the plumbing from freezing temperatures. A burst pipe can cause catastrophic damage, and the most common cause is a fundamental design flaw during installation. Many assume that simply shutting off the water and letting the pipes drain by gravity is enough. This is a critical and costly mistake, as water will always remain in low spots and P-traps, ready to freeze and expand.
The solution must be designed into the system from day one. As one plumbing expert from the Outdoor Kitchen Design Guide emphasizes, the entire system’s layout is paramount:
The biggest mistake happens during installation. The entire outdoor plumbing system must be designed to pitch towards a single, accessible indoor shut-off and drain valve.
– Professional Plumbing Installation Expert, Outdoor Kitchen Design Guide
This design allows for a proper winterization process that goes far beyond simple draining. A truly protected system requires actively purging all water from the lines. For anyone considering an outdoor sink, ice maker, or refrigerator with a water line, understanding and insisting on a professional winterization-ready installation is non-negotiable. The following steps outline the correct professional method:
- Ensure the entire system is installed with a pitch toward a single indoor shut-off and drain valve.
- Use an air compressor at 40-50 PSI to forcefully blow out all water from every line after shutting off the main supply.
- Do not rely on gravity draining alone, as it will not clear all water.
- Specifically winterize all water-using appliances according to manufacturer instructions, including ice makers, refrigerators, and sinks.
- Consider installing electric heat tape on any vulnerable sections that remain exposed.
- After draining, add non-toxic RV antifreeze to all P-traps to prevent them from freezing and cracking.
Broken Plan vs Open Plan: Which Suits a Family with Teenagers Better?
The concept of “flow” extends beyond the door threshold and into the interior layout itself. While a fully open-plan design seems ideal for connecting to the outdoors, it can be challenging for a family with teenagers who crave both connection and personal space. This is where a broken-plan layout offers a superior solution. It maintains the light and visual connection of an open plan but uses subtle dividers to create distinct functional zones. This facilitates “together-apart” living, a crucial dynamic for families with older children.
A broken-plan design uses elements like half-walls, wide pocket door systems, open-back bookshelves, or even small changes in floor level (one or two steps) to delineate spaces. This allows for a semi-private homework nook or a social space for teens that is acoustically separate but still feels connected to the family hub. It’s the architectural answer to a teenager wanting privacy in their room while parents wish for more family time.
Crucially, this approach allows for multiple, purposeful connections to the outdoors. The main family area can open onto a large, social patio, while a quieter reading zone created by the broken-plan layout might open onto a small, private deck or contemplative garden space. This creates zoned functionality that mirrors the varied needs of a multi-generational family, giving everyone their own physical and visual link to the outside world without sacrificing a sense of household unity.
Glass Screens vs Hedges: Which Blocks Wind Without Killing the View?
Even on a warm day, a persistent wind can make a patio unpleasant and unusable. Creating a calm, sheltered area is another key to extending its use. While hedges seem like a natural solution, they can grow to obstruct a prized view. Frameless glass screens, on the other hand, offer perfect visual clarity but come with their own aerodynamic drawback. A solid barrier like glass doesn’t stop the wind; it deflects it, often creating significant turbulence and eddies on the leeward side. A hedge, being permeable, is more effective at filtering and slowing the wind, creating a larger, calmer zone of protection.
So, which is better? From an architectural perspective, the optimal solution is often a hybrid approach that leverages the best qualities of both materials. This involves using tempered glass panels for the lower portion of the screen to preserve the view from a seated position, topped with or flanked by carefully chosen plantings that filter the wind at a higher level. This strategy provides effective wind-breaking while maintaining the “borrowed landscape” of the view beyond.
The choice depends heavily on your specific site, wind direction, and priorities. The table below compares the key features of each option to help guide your decision. The hybrid solution, while the most complex and costly, consistently delivers the most effective and comfortable result by managing both wind and views.
| Feature | Glass Screens | Hedges | Hybrid Solution |
|---|---|---|---|
| Wind Protection | Creates turbulence on leeward side | Filters wind, larger calm zone | Best of both |
| View Preservation | 100% when clean | Partial obstruction | Lower glass preserves seated view |
| Maintenance | Constant cleaning for clear view | Seasonal trimming | Moderate both |
| Light Impact | Can create glare | Diffuses light softly | Balanced lighting |
| Installation Cost | High initial | Low initial, grows over time | Highest but most effective |
Key Takeaways
- The foundation of indoor-outdoor flow is a zero-height, fully flush threshold that removes the physical and psychological barrier to the outside.
- For a patio to be a true living room extension, it must have all-weather coverage like a louvered pergola, not just a sun shade.
- Strategic, layered privacy screening is more effective and feels better in a small yard than a solid, fortress-like fence.
Landscaping for ROI: Which Exterior Upgrades Increase Home Value Most?
When investing in your outdoor space, it’s wise to consider which upgrades not only enhance your lifestyle but also provide the best return on investment (ROI). For a home focused on indoor-outdoor living, the value is in creating genuinely usable space. Generic “curb appeal” takes a back seat to “backyard appeal.” The most valuable upgrades are those that functionally extend the home’s square footage. Structures that provide coverage, like pergolas and well-built patios, are consistently top performers in this regard. In fact, market research from 2024 reveals that over 60.6% of outdoor living structure market revenue in North America comes from pergolas and covered patios, underscoring their perceived value.
However, not all upgrades are created equal, especially in a small suburban yard. An oversized, complex outdoor kitchen might seem luxurious, but if it consumes the entire yard, it can actually detract from the home’s value by eliminating flexible green space. The smartest investments are those that maximize functionality without overwhelming the property. Sometimes, the highest ROI comes from strategic subtraction: removing an old, oversized shed that blocks light or replacing a high-maintenance lawn with a beautiful, low-maintenance deck.
To guide your decisions, here is a clear hierarchy of exterior upgrades based on their typical ROI for small suburban homes:
- Tier 1 (Highest ROI): A well-built deck or patio that acts as a true home extension, sophisticated and layered privacy screening, and mature, low-maintenance plantings that add beauty without creating work.
- Tier 2 (Good ROI): A quality fire feature (like a gas fire table), professionally installed landscape lighting that extends usability into the evening, and a pergola with adjustable coverage.
- Tier 3 (Personal/Low ROI): High-maintenance water features, hot tubs (which can be seen as a liability by some buyers), and complex outdoor kitchens that dominate a small yard.
By applying these spatial principles—from the micro-detail of the threshold to the macro-strategy of your interior layout—you can fundamentally transform your property. The next step is to analyze your own home and garden to identify the primary barrier holding you back, and begin engineering your perfect indoor-outdoor connection.