Achieving pristine, chemical-free fountain water isn’t about constant cleaning; it’s about creating a balanced aquatic micro-ecosystem.
- Proactive biological methods like barley straw consistently outperform reactive sterilization for long-term health.
- System integrity—from pump acoustics to winter protection—directly impacts water quality and sensory enjoyment.
Recommendation: Focus on balancing the system’s inputs (light, debris) and outputs (sound, aeration) to let clarity emerge naturally.
The allure of a stone fountain is its promise of sensory wellness—the gentle sound of trickling water, a cool focal point on a warm day. Yet, for many eco-conscious homeowners, this dream quickly turns into a frustrating battle against green, murky water. The common advice often involves a cycle of draining, scrubbing, and resorting to chemical algaecides, which feels at odds with creating a natural garden sanctuary. Other quick fixes, like using distilled water or adding household products, are either impractical at scale or risk damaging the pump and the stone itself over the long term.
But what if the entire approach is flawed? The secret to maintaining a clear fountain without chemicals isn’t found in a bottle or through constant intervention. The true key lies in shifting perspective: stop treating your fountain as a decorative object to be kept sterile, and start cultivating it as a balanced, self-sustaining aquatic micro-ecosystem. In a healthy system, clarity is not a goal to be fought for, but a natural byproduct of equilibrium. The pump is not just a motor; it is the heart and lungs of this system, and the stone is its vessel.
This guide provides a specialist’s approach, focusing on the biology and mechanics that govern your fountain’s health. We will deconstruct the system, from silencing the pump to tuning its sound, choosing biological clarifiers, protecting the stone from the elements, and using light to extend its beauty. By understanding and managing your fountain as a living micro-ecosystem, you can achieve the effortless clarity and sensory peace you’ve always wanted.
This comprehensive guide will walk you through each critical component of your fountain’s ecosystem. The following sections provide expert strategies to help you achieve natural water clarity and long-term durability.
Summary: A Holistic Approach to Fountain Maintenance
- How to Silence a Humming Pump so You Only Hear Water?
- Barley Straw vs UV Clarifiers: Which Keeps Water Clear Naturally?
- Auto-Fill Valves: Are They Necessary for Small Fountains?
- How to Prevent Your Stone Fountain from Cracking in Freezing Temps?
- Where to Place Water Features to Maximize Relaxation Zones?
- How to Use White Noise to Drown Out City Traffic?
- When to Reseal Natural Stone: The Water Droplet Test
- Solar-Powered LED Path Lights: Which Models Actually Last Through Winter?
How to Silence a Humming Pump so You Only Hear Water?
The first step in curating a relaxing sensory experience is ensuring the only sound you hear is the water itself, not the mechanical drone of the pump. A noisy pump is more than an annoyance; it’s a sign of vibration, inefficiency, or stress within the system. The goal is acoustic decoupling: physically isolating the pump so its vibrations can’t transfer to the fountain’s stone structure and amplify. A humming pump creates a high-frequency noise that directly competes with the soothing, variable frequencies of moving water.
Instead of just accepting the noise, think of the pump as the engine of your micro-ecosystem. A quiet, efficient pump is a healthy one. One of the most effective professional strategies is to use an oversized, high-quality pump run at a lower capacity. For instance, running a pump rated for 1000 gallons per hour (GPH) at only 60-70% of its power is significantly quieter than running a 700 GPH pump at 100%. This reduces the motor’s acoustic signature while providing robust aeration for your fountain’s biological engine.
You can achieve near-silent operation by creating multiple layers of sound dampening. According to specialized guides on acoustic management, the most effective method involves creating a barrier between the pump and the basin floor. Start by placing a dense rubber or silicone mat under the pump. Then, elevate it on rubber isolators to create an air gap, which further disrupts vibration transfer. This ensures the pump’s operational noise is absorbed before it can become part of your garden’s soundscape. Sourcing the right materials is key, as demonstrated by an acoustic decoupling method for fountain pumps which details using specific high-density pads.
Barley Straw vs UV Clarifiers: Which Keeps Water Clear Naturally?
When it comes to water clarity, you face a fundamental philosophical choice: proactive ecosystem balancing or reactive water sterilization. This choice is perfectly embodied in the comparison between barley straw and Ultraviolet (UV) clarifiers. A UV clarifier works by exposing water to UV-C light, which kills single-celled algae and other microorganisms as they pass through. It provides immediate results but functions like a sterilizing agent, creating a “clean slate” that can be quickly recolonized if the underlying nutrient issues aren’t addressed. It is a constant, energy-dependent battle.
Barley straw, conversely, is a biological method that works *with* your micro-ecosystem. As the straw decomposes in oxygen-rich water (aerated by your pump), it releases natural compounds. These compounds don’t kill existing algae but inhibit the growth of new algal blooms. It’s a proactive approach that supports the health of the entire system. Research from Penn State Extension confirms barley straw remains effective for approximately six months after application, making it a low-effort, long-term solution. It fosters a stable environment where beneficial bacteria can thrive, helping to break down other organic waste.

The key difference is the impact on your fountain’s “biological engine.” UV clarifiers are indiscriminate, killing beneficial bacteria along with algae, which can hinder the system’s natural ability to process waste. Barley straw supports this engine. The choice depends on your goals: if you need a quick fix for a green-water crisis, a UV clarifier is effective. If you are an eco-conscious owner aiming for a self-sustaining, chemical-free ecosystem, barley straw is the superior long-term strategy.
| Aspect | Barley Straw | UV Clarifiers |
|---|---|---|
| Philosophy | Proactive ecosystem balancing | Reactive water sterilization |
| Action Time | 6-8 weeks in cold water, 1-2 weeks in warm | Immediate results |
| Effect Duration | 6 months per application | Continuous while operating |
| Ecosystem Impact | Supports beneficial bacteria | Kills all microorganisms |
| Application Rate | 2-3 bales per surface acre | Based on GPH flow rate |
| Cost | Low initial, no electricity | Higher initial plus ongoing power |
Auto-Fill Valves: Are They Necessary for Small Fountains?
A stable water level is critical for a healthy aquatic micro-ecosystem. Evaporation, especially on hot or windy days, can cause the water level to drop rapidly. When this happens, the pump can run dry, leading to overheating and permanent damage. Fluctuating water levels also change the water’s mineral concentration and temperature, stressing the biological balance. Manually topping off a fountain daily can become a chore, which is where an auto-fill valve comes in. So, are they a necessary component or an optional convenience?
For small, self-contained fountains with a minimal surface area, an auto-fill valve may be an over-engineered solution. The rate of evaporation might be slow enough that a weekly top-off is sufficient. In these cases, the added complexity and potential for leaks might outweigh the benefit. However, for larger fountains, those in direct sun, or for homeowners who travel frequently, an auto-fill valve transitions from a luxury to a near-necessity. It provides peace of mind and, more importantly, ensures the stability of the ecosystem by maintaining a consistent water volume.
If you decide to install one, choosing the right type is crucial. Mechanical float valves are simple and reliable but can sometimes produce a slight hissing sound as they fill. For those highly sensitive to noise, silent electronic sensor systems are a better, albeit more expensive, option. Proper installation is key to preventing issues. According to installation guides, one of the most important steps is to connect the water source correctly using either a dedicated PVC line or a standard garden hose, and then to flush the system to clear any debris before final operation. An auto-fill valve automates a key maintenance task, allowing the system to self-regulate one of its most vital parameters.
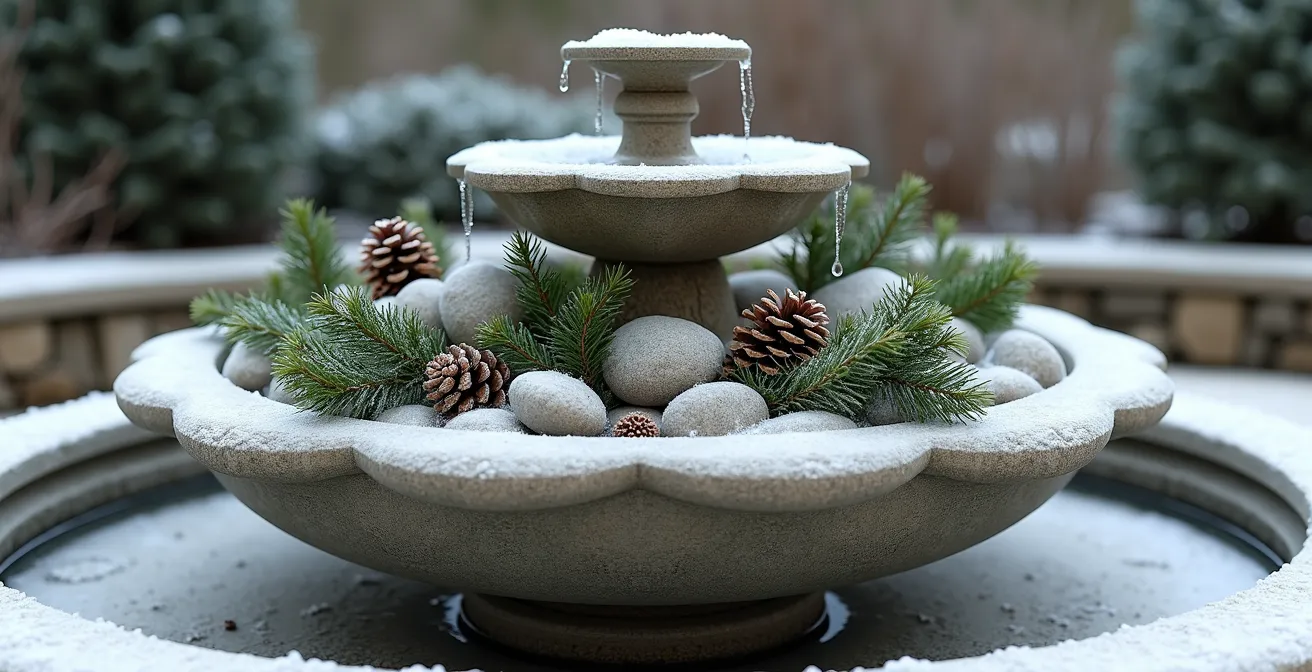
How to Prevent Your Stone Fountain from Cracking in Freezing Temps?
Winterization is not just about maintenance; it’s about preserving the very vessel of your aquatic micro-ecosystem. The single greatest threat to a stone fountain is the freeze-thaw cycle. The porous nature of materials like cast stone makes them act like a sponge. When water absorbed into the stone’s pores freezes, it expands with immense force, causing microscopic fissures that grow into visible cracks and spalling over time. Protecting your fountain from this process is non-negotiable for its longevity.
The most foolproof method, especially for smaller fountains, is to move them indoors to a dry, frost-free location like a garage or shed. However, for large, heavy installations, this is not practical. The primary goal for stationary fountains is to ensure they are completely dry before the first hard freeze. This involves draining all water from the basins, pipes, and pump. The pump should be removed and stored indoors. After draining, use sponges or towels to absorb any residual moisture from the bowls.
Beyond draining, professional strategies focus on preventing moisture from wicking up from the frozen ground. As documented by fountain care specialists, elevating the fountain off the ground on wooden blocks significantly reduces the risk of freeze-thaw damage. Once dry, using a high-quality, breathable fountain cover is essential. Avoid generic plastic tarps, which can trap condensation and create a humid microclimate, defeating the purpose of drying the fountain in the first place. A proper cover protects from winter precipitation while allowing any remaining moisture within the stone to evaporate.
Where to Place Water Features to Maximize Relaxation Zones?
The placement of your fountain has a profound impact on both its health as an ecosystem and its effectiveness as a tool for sensory wellness. From a biological perspective, placement dictates two key inputs to the system: sunlight and organic debris (the “nutrient load”). Placing a fountain in full, direct sun will fuel algae growth, while placing it directly under a deciduous tree will fill it with leaves, pollen, and other debris that decompose and feed algae. The ideal spot is often one that receives morning sun and afternoon shade, away from heavy leaf-drop zones.
From a sensory perspective, placement is about soundscaping. A strategically placed fountain can create an “acoustic zone,” using the pleasant sound of water to mask undesirable noises like city traffic or neighbors. Research shows that water features excel as natural sound absorbers, with the moving water creating a form of natural white noise that is more complex and soothing than electronic alternatives. To maximize this effect, position the fountain between your primary seating area and the source of the unwanted noise.
Finally, consider the principle of “borrowed scenery” and biophilic connection. Position the fountain where it can be seen and heard from inside your home, such as through a kitchen or home office window. This creates a constant connection to nature. Orient it to catch the light in interesting ways—framing a sunrise or reflecting the colors of a sunset through its spray. A well-placed fountain does more than look good; it actively manages its own nutrient load, reshapes the soundscape of your garden, and becomes an integral part of your daily life.
How to Use White Noise to Drown Out City Traffic?
While a fountain’s visual appeal is immediate, its acoustic contribution is what transforms a space into a sanctuary. The sound of moving water provides a natural, non-repetitive form of “white noise” that is exceptionally effective at masking the harsh, steady drones of urban life, such as traffic or air conditioners. Unlike artificial white noise machines that produce a static, electronic hiss, the sound of a fountain is rich with complex frequencies that our brains perceive as inherently calming.
The key to effective sound masking is to tune your fountain’s acoustic signature to counter the specific noise pollution you face. This isn’t a one-size-fits-all process; it’s a matter of acoustic engineering. You can adjust the sound’s volume and frequency by manipulating the water’s flow and fall. For instance, to mask low-frequency rumbles from traffic, you need a deeper, more resonant sound. To mask higher-pitched noises, a lighter, trickling sound is more effective. You can actively tune your fountain’s sound using several techniques:
- Adjust Flow Rate: A higher flow rate creates a more powerful, lower-frequency splashing sound. Decreasing the flow produces a gentler, higher-pitched trickle.
- Modify Drop Height: The farther the water falls, the louder and deeper the sound will be upon impact. Shortening the drop creates a softer sound.
- Change the Landing Surface: Water falling into a deep pool produces a resonant “plunking” noise. Water falling onto smooth river stones or pebbles creates a brighter, more complex splashing sound.
- Introduce Obstacles: Placing a few strategic stones in the path of a cascade will break up the single stream of water, creating multiple layers of sound.
By experimenting with these variables, you can compose a soundscape that not only blocks out unwanted noise but also actively promotes relaxation. Combining the fountain with sound-absorbing elements like dense hedges or soft-bladed ornamental grasses further enhances its effectiveness as an acoustic shield.
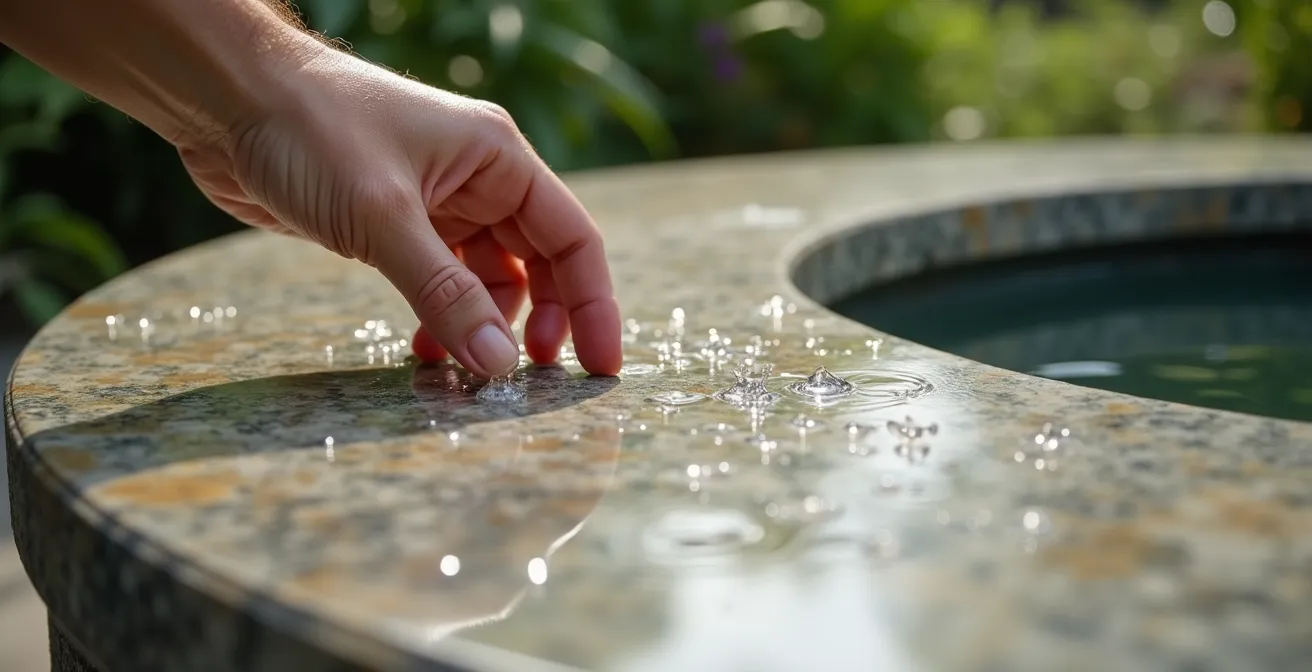
When to Reseal Natural Stone: The Water Droplet Test
The stone of your fountain is the foundation of its beauty and longevity. While durable, natural stone is porous and requires periodic sealing to protect it from staining, erosion, and the damaging effects of water absorption. Over-sealing can be as harmful as under-sealing, as it can trap moisture within the stone, leading to flaking or spalling. So, how do you know when it’s the right time to reseal? The answer isn’t a rigid schedule but a simple, diagnostic observation: the water droplet test.
This test is the most reliable way to assess whether your stone’s protective barrier is still effective. Simply place a few drops of water on a clean, dry surface of the fountain. Then, watch what happens. If the water beads up and remains on the surface, the existing sealer is still working effectively. If the water darkens the stone and is absorbed within 10-15 minutes, it’s a clear sign that the stone’s pores are open and it’s time to reapply a sealer. Experts generally recommend performing this test annually and expect to seal natural stone every 1-2 years, depending on the type of stone and its exposure to the elements.
Choosing the right sealer is also a critical decision that affects both protection and aesthetics. An “enhancing” sealer will give the stone a permanent “wet look,” deepening its colors and bringing out its veining. A “natural” or “impregnating” sealer, on the other hand, will provide protection without altering the stone’s original appearance. This decision is part of a larger maintenance philosophy: do you want to maintain a pristine, “like-new” condition, or embrace the natural patina and aging process of the stone, often referred to as a wabi-sabi approach?
Your 5-Step Stone Sealing Audit
- Perform the Droplet Test: Place water drops on a clean, dry surface. If they are absorbed within 10-15 minutes, sealing is required. If they bead, no action is needed.
- Assess Aesthetic Goals: Decide if you want to maintain the stone’s natural look (use an impregnating sealer) or deepen its color (use an enhancing sealer).
- Clean Thoroughly: Before sealing, wash the entire fountain with a pH-neutral stone cleaner to remove dirt and algae. Allow it to dry completely for at least 24 hours.
- Check for Over-Sealing: Inspect the surface for any signs of a cloudy film, flaking, or spalling, which could indicate trapped moisture from a previous sealing job. If present, do not reseal.
- Apply Sealer Correctly: Apply a thin, even coat of your chosen sealer with a clean cloth or brush, following the manufacturer’s instructions. Wipe away any excess to prevent a sticky residue.
Key Takeaways
- A clear, healthy fountain is a balanced micro-ecosystem, not a sterile container.
- Proactive biological controls (like barley straw) and proper aeration are more sustainable than reactive chemical or UV treatments.
- Every component—from the pump’s sound to the stone’s porosity—is interconnected and affects the system’s overall health and sensory output.
Solar-Powered LED Path Lights: Which Models Actually Last Through Winter?
The sensory experience of a fountain shouldn’t end when the sun goes down. Lighting transforms it into a dramatic, 24-hour feature. While the H2 title mentions solar path lights, a specialist’s view on winter reliability points toward a more robust solution for the fountain itself: low-voltage wired systems. Solar lights, especially inexpensive models, struggle during winter’s short days and long nights, often failing to hold a charge long enough to be effective. For the critical task of illuminating the water, consistency is key.
A low-voltage (12V) wired LED system offers superior reliability, performance, and control. These systems are safe to use in and around water and provide consistent brightness regardless of the weather. The lighting strategy itself can take two forms. Uplighting, using submersible LED fixtures placed in the basin, creates a dramatic shimmering effect as the light shines up through the moving water. Downlighting, from a nearby tree or structure, mimics the gentle, natural effect of moonlight on the water’s surface.
For a truly harmonious effect, the color temperature of the light is critical. Choose warm-toned LEDs (2700K-3000K) to create a cozy, inviting glow that resembles firelight on the water. Cooler, bluer tones (4000K and above) can appear clinical and harsh at night. If you are committed to a solar solution, opt for high-quality systems with a large, remote solar panel that can be positioned for maximum sun exposure, connected to the submersible fountain lights via waterproof cables. In either case, connecting the system to an automatic timer ensures the fountain becomes a focal point during evening relaxation hours while conserving energy overnight, completing its role in your garden’s sensory wellness landscape.
By embracing this ecosystem-based approach, you can move beyond the cycle of chemical treatments and constant cleaning. Start today by observing your fountain, understanding its interconnected parts, and making small adjustments to bring the entire system into a state of natural, beautiful balance.