The right choice for your cathedral ceiling is a building science decision, not just a material comparison. It’s about controlling air, vapor, and heat as a complete system.
- Spray foam creates a monolithic air and vapor barrier, maximizing air tightness but offering little room for error or future service.
- Mineral wool is vapor-permeable, excellent for acoustics, and fully serviceable, but demands a perfectly executed, multi-layer control system to prevent moisture damage.
Recommendation: For many high-performance projects, a hybrid “flash-and-batt” system—combining a thin layer of spray foam for air sealing with mineral wool for bulk insulation—offers the best balance of performance, cost, and risk management.
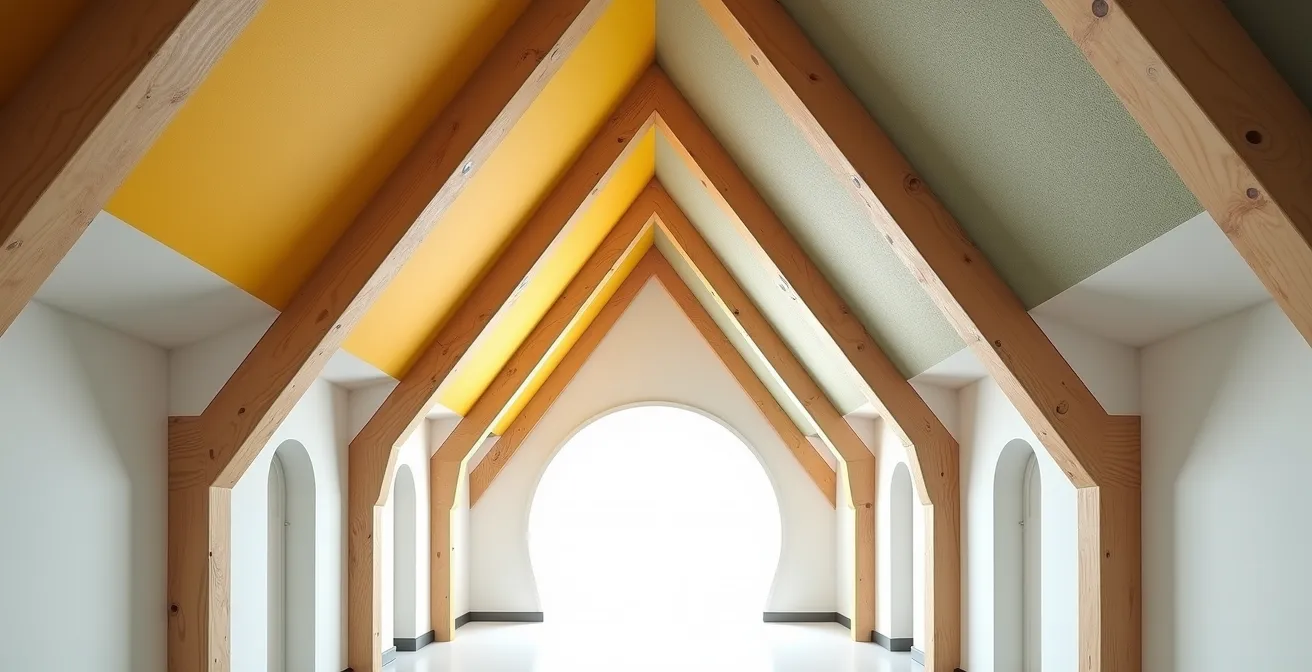
As an insulation contractor, one of the most critical jobs we tackle is the cathedral ceiling. It’s a defining architectural feature, but it’s also the most vulnerable part of a home’s thermal envelope. The debate often gets simplified to “spray foam versus mineral wool.” Many articles will tell you spray foam has a higher R-value per inch, while mineral wool is better for soundproofing. While true, these are just surface-level facts. Choosing the wrong system doesn’t just lead to high energy bills; it can lead to condensation, rot, and catastrophic failure of the roof structure itself.
The real question isn’t just about the insulation material. It’s about the entire building assembly and how it will manage the flow of heat, air, and moisture for the next 50 years. The decision hinges on understanding concepts like vapor permeance, effective R-value, and the role of continuity layers. But what if the conventional wisdom is incomplete? What if the best solution isn’t an “either/or” choice, but a strategic combination of materials designed to create a resilient, high-performance roof assembly? This guide moves beyond the simple pros and cons to give you the technical, product-savvy perspective of a contractor. We will break down the critical building science principles you must understand to make an informed decision for your project.
This article provides a detailed, technical comparison to help you understand the full system implications of your insulation choice. Explore the sections below to master the key concepts that determine long-term performance and durability for your cathedral ceiling.
Summary: A Technical Guide to Insulating Cathedral Ceilings
- Why Vapor Barriers Are Essential When Using Fiber Insulation?
- Nominal vs Effective R-Value: What Your Walls Are Actually Delivering?
- Rockwool vs Fiberglass: Which Insulation Block Street Noise Better?
- Is Off-Gassing from Spray Foam a Long-Term Health Risk?
- How to Insulate Walls Without Removing Drywall: Injection Foam Pros and Cons
- Air Source Heat Pumps: Do They Really Work in Below-Freezing Climates?
- The Acoustics Oversight That Makes Open Plans Unbearable for Introverts
- Triple Pane vs Double Pane: Is the Extra Cost Worth It for Moderate Climates?
Why Vapor Barriers Are Essential When Using Fiber Insulation?
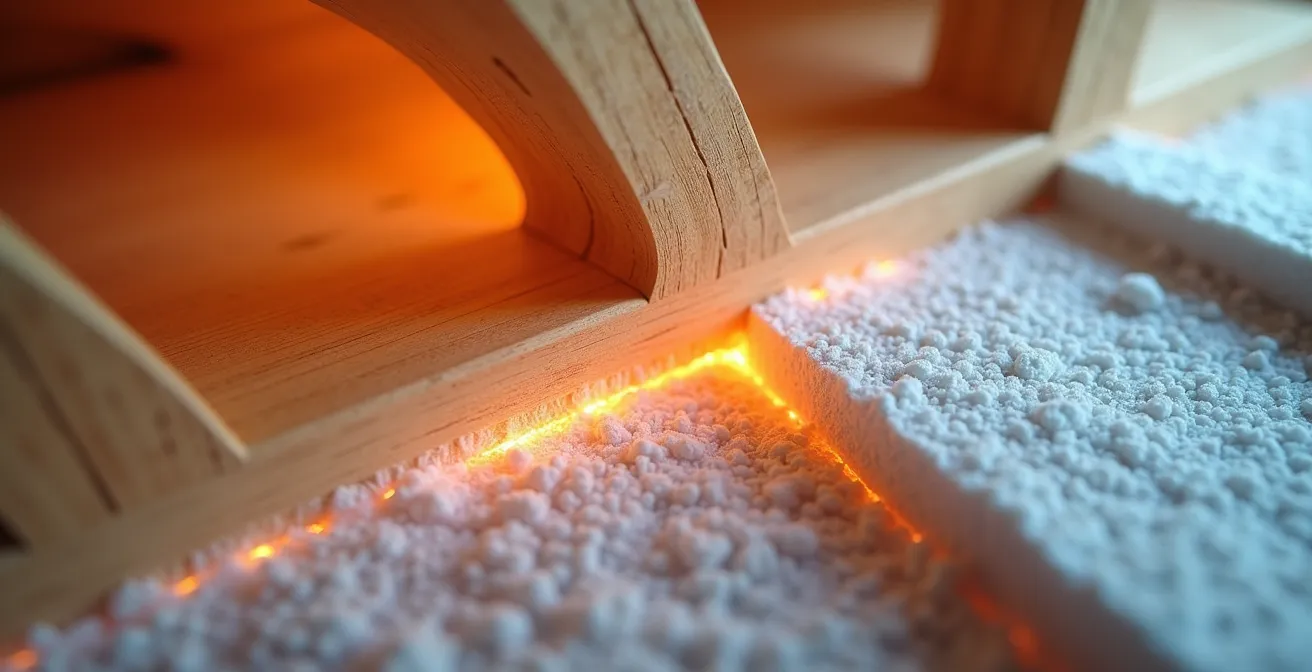
When you opt for a fiber-based insulation like mineral wool or fiberglass in a cathedral ceiling, you are choosing a vapor-permeable material. This is not a flaw; it’s a feature that must be managed. Unlike closed-cell spray foam, which is impervious to moisture, mineral wool allows water vapor to pass through it. In a cold climate, warm, moist interior air will try to move through the ceiling assembly towards the cold exterior. If it cools to its dew point within the insulation cavity, that vapor will condense into liquid water. This is a recipe for disaster, as studies show that mineral wool can absorb up to 130% of its weight in water, destroying its R-value and potentially leading to mold and rot in the roof structure.
This is why a dedicated vapor control layer on the warm-in-winter side of the insulation is non-negotiable. This isn’t just a sheet of plastic; it’s a precisely chosen material whose permeance (how easily vapor passes through) is matched to your climate zone. A simple coat of latex paint might suffice in a hot, dry climate, but a cold or mixed climate requires a more robust solution. Smart vapor retarders like MemBrain or Intello are often the best choice, as they change their permeance based on humidity—blocking vapor in the winter but allowing the assembly to dry out in the summer. A vented air gap between the top of the insulation and the roof sheathing is also a critical part of this system, providing a path for any incidental moisture to escape.
The table below from building science experts illustrates how vapor retarder requirements change based on climate, underscoring that this is a technical, system-based decision.
| Climate Zone | Vapor Retarder Class | Permeance Range | Recommended Material |
|---|---|---|---|
| Zones 1-3 | Class III | 1.0-10 perms | Latex paint |
| Zone 4 Marine | Class II | 0.1-1.0 perms | MemBrain/Intello |
| Zones 5-8 | Class I-II | <1.0 perms | Smart vapor retarders |
Nominal vs Effective R-Value: What Your Walls Are Actually Delivering?
One of the biggest mistakes renovators make is focusing solely on the “nominal” R-value of the insulation product itself. An R-30 mineral wool batt is only R-30 in a perfect lab setting. In your cathedral ceiling, the wooden rafters that frame the insulation cavities are a significant source of heat loss. Wood has an R-value of about R-1 per inch, meaning a 2×12 rafter (11.25 inches deep) is only about R-11. This creates a “thermal bridge”—a highway for heat to bypass your expensive insulation.
This effect is not trivial. Building science analysis shows that thermal bridging through rafters reduces the overall R-value by 10-15% or more. Your “R-49” ceiling might only be performing at an effective R-42. This is where the air-sealing and monolithic nature of spray foam shines. When applied directly to the sheathing and rafters, it encapsulates the thermal bridges. A more advanced technique, the “flash-and-batt” system, offers a powerful compromise.
This hybrid approach involves applying a thin layer (1-2 inches) of closed-cell spray foam against the roof sheathing, which acts as a perfect air and vapor barrier and breaks the primary thermal bridge. The rest of the cavity is then filled with cost-effective mineral wool. For example, a 2×12 cavity with 2″ of foam (R-12) and an R-30 batt achieves a high-performance assembly. This whole-system R-value is what truly matters for energy bills and comfort, not just the number printed on the insulation bag.
Case Study: Flash-and-Batt System Performance
A documented 2×12 cathedral ceiling assembly using 2 inches of closed-cell spray foam (R-12) combined with R-30 mineral wool batts achieved an effective whole-assembly R-value of R-38. This was lower than the nominal R-49 of a full-fill fiber system but provided superior air sealing and moisture control, ultimately delivering better real-world performance than a poorly air-sealed R-49 assembly, and at a lower cost than a full-depth foam installation.
Rockwool vs Fiberglass: Which Insulation Block Street Noise Better?
While thermal performance is primary, a cathedral ceiling is also a huge surface area exposed to exterior noise. For homes near busy roads, airports, or even just noisy neighborhoods, acoustic performance is a major quality-of-life factor. In this arena, mineral wool (often referred to by the brand name Rockwool) has a distinct, measurable advantage over fiberglass. The reason is density. Mineral wool is manufactured from molten rock, resulting in a denser, more rigid batt that is inherently better at blocking and absorbing sound waves.
This performance is measured by the Sound Transmission Class (STC) rating, which indicates how well a building assembly blocks airborne sound. A higher number is better. In typical assemblies, mineral wool provides superior sound blocking with an STC of 45, compared to a comparable fiberglass assembly which might only achieve an STC of 39. A 6-point difference is significant and easily noticeable to the human ear. Closed-cell spray foam, while an excellent air barrier, is rigid and lightweight, making it less effective as a sound blocker than dense mineral wool.
A truly effective soundproofing strategy, however, is a system approach. Combining the right materials delivers results that no single product can achieve alone. A good-better-best approach for a cathedral ceiling might look like this:
- Good: Install dense-pack mineral wool (3.0-4.0 PCF) between the rafters for basic sound absorption and blocking.
- Better: Add mass by using 5/8″ acoustic drywall (Type X) on the interior, which is heavier than standard drywall.
- Best: Create a fully decoupled assembly. Use a flash-and-batt system for air sealing, fill with mineral wool, and then attach the drywall to resilient channels. These metal channels create a physical break, preventing sound vibrations from traveling through the rafters into the room.
Is Off-Gassing from Spray Foam a Long-Term Health Risk?
The most significant concern homeowners have with spray polyurethane foam (SPF) is health and safety, specifically regarding off-gassing. This is a valid concern that must be addressed with technical accuracy, not fear. SPF is a two-part chemical product mixed on-site. The potential for hazardous emissions is almost entirely confined to the installation and curing period. During this time, volatile organic compounds (VOCs) are released as the foam expands and hardens.
However, once the foam is fully cured—a process that typically takes 24 to 72 hours—the chemical reaction is complete. The foam becomes an inert, stable plastic. As noted by industry experts, the risk of long-term issues is directly tied to the quality of the installation. When installed correctly, the risks are minimal. The problems you hear about almost always stem from an improper application: an incorrect ratio of the two chemicals (off-ratio foam), incorrect temperature, or application to a damp substrate. An off-ratio mix may never cure properly, leading to lingering odors and potential long-term off-gassing.
The primary danger window is the installation and curing process. When properly applied by certified installers with correct chemical ratios, temperature, and substrate moisture, long-term off-gassing risks are minimal.
– Larry Janesky, Dr. Energy Saver Technical Guidelines
This places the burden of safety squarely on choosing a qualified, certified contractor. Your due diligence is the best protection against a bad installation. A professional crew will insist on proper ventilation and have a strict protocol for when it is safe to re-enter the home.
Your Checklist for Vetting a Spray Foam Contractor
- Verify Certification: Ask for proof of training and certification from the Spray Polyurethane Foam Alliance (SPFA) or the product manufacturer.
- Demand a Safety Protocol: Request the contractor’s documented plan for site ventilation during and after application, including a clear re-entry time (minimum 24-72 hours).
- Question Ratio Monitoring: Ask how they verify the on-site chemical mix ratio. Professional rigs use sophisticated monitoring equipment to ensure it’s correct.
- Confirm Warranty Coverage: Ensure the warranty explicitly covers issues like shrinkage, poor adhesion, or problems arising from an off-ratio application.
- Check Relevant References: Ask for references from similar cathedral ceiling projects they have completed within the last two years and follow up with them.
How to Insulate Walls Without Removing Drywall: Injection Foam Pros and Cons
Clients often ask if we can use injection foam—the kind used to insulate existing wall cavities—for their cathedral ceilings. The answer is an emphatic and unequivocal no. While it’s a great solution for standard walls, injection foam is fundamentally unsuitable for cathedral ceilings with 0% suitability for the application. The reasons are critical to understand. First, it’s a blind application. You can’t see where the foam is going, making it impossible to ensure a complete fill or avoid blocking the crucial ventilation channels required in a fiber-insulated assembly. Second, the expansion pressure can be high enough to damage the interior drywall or exterior roof sheathing.
So, how can you insulate an *existing* cathedral ceiling without a full gut renovation? The answer isn’t injection foam, but a targeted spray foam application using what we call the “strip method.” This is a professional technique for retrofit projects that balances performance with minimal disruption. It involves strategically cutting and removing 1-to-2-foot-wide strips of drywall along the ceiling—typically at the bottom (soffit), the middle, and the top (peak).
These openings provide the necessary visual and physical access for an installer to properly apply spray foam. They can spray from the soffit up to the peak, ensuring complete coverage, a continuous air seal, and importantly, visual confirmation that the foam fills the cavity correctly without crushing or expanding uncontrollably. Once the foam is cured, the drywall strips are re-installed, taped, and mudded. While more invasive than injection foam, this method is the only professionally accepted way to properly use spray foam in an existing, finished cathedral ceiling, guaranteeing a high-performance and durable result.
Case Study: The “Strip Method” Retrofit
RetroFoam of Michigan, a specialized contractor, documented a successful cathedral ceiling retrofit using this technique. By cutting strips through the drywall, their installers maintained full control over the spray foam application from soffit to peak. This allowed them to achieve a complete cavity fill and a perfect air seal without blocking ventilation channels. The strips were then patched and finished, delivering the full performance benefits of a spray foam system with significantly less disruption than a complete tear-out.
Air Source Heat Pumps: Do They Really Work in Below-Freezing Climates?
Your cathedral ceiling’s insulation level has a direct and massive impact on your home’s heating and cooling system. This is especially true with modern air source heat pumps. Today’s cold-climate heat pumps are incredibly efficient, but their performance is still tied to the outdoor temperature. A heat pump’s efficiency is measured by its Coefficient of Performance (COP)—a ratio of how much heat it produces for every unit of electricity it consumes. As temperatures drop, so does the COP.
For example, a high-efficiency model might have a COP of 3.0 at 47°F (8°C), but building science data shows that modern cold-climate heat pump efficiency can drop to a COP of 1.5 at 5°F (-15°C). This means the colder it gets, the harder your system has to work. This is where your cathedral ceiling comes in. A poorly insulated, leaky ceiling (low effective R-value) forces you to install a larger, more expensive heat pump. That oversized unit will then have to run more often in cold weather, consuming more electricity and costing you more every month.
A high-performance cathedral ceiling (R-49 or higher) dramatically reduces the heating load. This allows you to install a smaller, less expensive heat pump that runs more efficiently. The upfront investment in better insulation pays for itself through both lower equipment costs and long-term energy savings. The building envelope and the HVAC system are two parts of the same machine. You cannot optimize one without considering the other.
| Ceiling Insulation Level | Heat Loss (BTU/hr) | Required Heat Pump Size | Annual Operating Cost |
|---|---|---|---|
| Code Minimum (R-30) | 45,000 | 4-ton | $2,400 |
| High Performance (R-49) | 28,000 | 2.5-ton | $1,500 |
| Passive House (R-60+) | 18,000 | 1.5-ton | $950 |
The Acoustics Oversight That Makes Open Plans Unbearable for Introverts
Cathedral ceilings are almost always a feature of open-plan “great rooms.” While visually stunning, these large, voluminous spaces with hard surfaces (drywall, hardwood floors, large windows) can become echo chambers. This isn’t about blocking outside noise (STC), but about controlling sound *within* the space. The metric for this is the Noise Reduction Coefficient (NRC), a measure of how much sound a material absorbs. A material with an NRC of 0.95 absorbs 95% of the sound that hits it, while a material with an NRC of 0.05 absorbs only 5%.
Standard drywall has an abysmal NRC of around 0.05. It reflects almost all sound, leading to high reverberation, poor speech clarity, and a generally noisy, stressful environment—especially for more introverted people who are sensitive to constant background noise. Your vast cathedral ceiling is the largest single surface in the room, and how you treat it acoustically will define the character of the space.
This is another area where mineral wool provides a significant secondary benefit beyond thermal insulation. Due to its dense, fibrous structure, mineral wool achieves exceptional sound absorption with an NRC of 0.95 or higher. While the insulation is hidden behind drywall, a significant amount of sound energy passes through the drywall, is absorbed by the mineral wool, and never bounces back into the room. Spray foam, being a rigid plastic, offers very little sound absorption. Choosing mineral wool for a cathedral ceiling in a great room is a strategic decision that contributes not just to thermal comfort, but to a calmer, quieter, and more pleasant living environment.
Key Takeaways
- System Over Material: The best solution is a complete assembly that manages heat, air, and moisture, not just a single product.
- Control Layers Are Key: Fiber insulation requires meticulous air and vapor control layers. Spray foam provides them monolithically but is permanent and installation-sensitive.
- Effective R-Value is What Matters: Account for thermal bridging through rafters. A hybrid “flash-and-batt” system is often the most effective real-world solution.
Triple Pane vs Double Pane: Is the Extra Cost Worth It for Moderate Climates?
Focusing all your budget and attention on creating a super-insulated R-60 cathedral ceiling is a waste of money if you ignore the biggest thermal holes in your building envelope: your windows. Even in a well-insulated home, an analysis of building performance data shows that windows can account for 25-30% of total heating and cooling loads. A standard double-pane window has a whole-unit R-value of about R-2. A high-performance triple-pane window can be R-7 or higher. When your ceiling is R-49, the windows become the undeniable weak link in the chain.
In moderate climates, the debate over triple-pane windows often comes down to payback. While the energy savings alone might not justify the higher upfront cost over a 5-year period, this view is too simplistic. From a building science perspective, the benefits are about more than just energy bills. High-performance windows create a more comfortable interior. The interior surface of a triple-pane window stays warmer in the winter, eliminating cold drafts and allowing you to feel comfortable at a lower thermostat setting. This comfort has real value.
Furthermore, an advanced “window tuning” strategy can optimize performance across the home. This involves using different types of triple-pane windows on different elevations to control solar heat gain. A contractor using this approach would:
- Install high Solar Heat Gain Coefficient (SHGC) windows on the south-facing side to capture free solar heat in the winter.
- Use low SHGC windows on the west-facing side to block intense afternoon sun in the summer.
- Specify standard low-e triple-pane windows on the north side for consistent thermal performance without solar gain.
Ultimately, insulating your cathedral ceiling is the cornerstone of creating a comfortable, durable, and energy-efficient home. By thinking like a contractor and focusing on the entire building assembly—from vapor control to window performance—you can make a choice that delivers real performance for decades. To ensure your project is built on these principles, the next logical step is to work with a certified professional who understands this systemic approach. Evaluate contractors in your area who can provide a detailed plan for your specific climate and building design.