
The key to a thriving high-rise garden isn’t just tough plants; it’s smart, weather-aware engineering from the ceiling down.
- Prioritize structural safety by understanding the dynamic forces of wind on hanging planters before selecting any hardware.
- Implement a closed-loop watering system and protective soil liners to manage resources and prevent erosion in harsh conditions.
- Select plants based on physical resilience (flexible stems, strong roots) rather than just a generic “wind-tolerant” label.
Recommendation: Secure your entire vertical system as a top priority. Only then should you choose the plants that will live within it.
The dream is a familiar one for any apartment dweller: a lush, cascading wall of green on the balcony, a private oasis high above the city. The reality, however, often involves wind-whipped leaves, dried-out soil, and the constant worry of a planter taking flight. Many guides suggest the solution lies in picking from a short list of “wind-resistant” plants. You dutifully buy succulents and ornamental grasses, only to find them struggling against the relentless buffeting ten stories up.
This approach often fails because it treats the symptom, not the cause. The problem isn’t just about choosing tougher plants; it’s about the physics of a high-rise environment. The wind doesn’t just blow—it creates lift, multiplies forces, and relentlessly strips moisture. A truly successful vertical garden on an exposed balcony is less about horticulture and more about engineering a cohesive, weather-resilient system that manages these forces from the anchor point in your ceiling all the way down to the soil in the pot.
But what if the secret wasn’t just in the plants, but in the intelligent design of the entire vertical structure? This guide reframes the challenge. Instead of starting with plant selection, we will start with structural integrity and systemic resilience. We’ll move beyond generic advice to give you the practical, weather-aware strategies needed to build a hanging garden that doesn’t just survive, but truly thrives in the face of the elements.
This article will walk you through the essential components of that system. We will cover how to safely secure your planters, implement smart irrigation, choose plants based on their physical attributes, and design a layout that is both beautiful and robust. Let’s build your sky-high oasis, the right way.
Summary: A Guide to Resilient High-Rise Vertical Gardens
- How to Secure Heavy Planters to a Balcony Ceiling Safely?
- Drip Irrigation for Hanging Baskets: Stopping the ‘Drip on Neighbors’
- Ferns vs Succulents: Which Plants Survive 10th Floor Winds?
- How to Stagger Heights to Create a ‘Green Curtain’ Effect?
- The Liner Trick to Keep Soil from Blowing Away in Storms
- How to Exploit Vertical Space to Double Your Storage Capacity?
- Why You Shouldn’t Amend Soil When Planting Natives?
- Design Hacks for Compact Urban Courtyards: Creating an Oasis in 200 Sq Ft
How to Secure Heavy Planters to a Balcony Ceiling Safely?
Before you even think about soil or seeds, your first priority must be structural integrity. A hanging planter on a high-rise balcony is not a static object; it’s a pendulum. In high winds, its weight is multiplied, creating significant stress on its anchor point. In fact, engineering studies show that a simple 10 lb planter can exert 30-50 lbs of dynamic force during a strong gust. Ignoring this fact is a critical mistake. Your ceiling’s capacity and the hardware you choose are the foundation of a safe and successful vertical garden.
The type of ceiling you have dictates the appropriate hardware. Simply using a standard hook screwed into drywall is a recipe for disaster. You must anchor directly into a structural element capable of bearing a load far exceeding the planter’s weight when wet. For concrete, this means heavy-duty expansion anchors. For exposed wooden joists, lag bolts are non-negotiable. Renters who cannot drill into the structure have options too, but they require careful consideration of load distribution, using tension systems or weighted cantilever stands designed for this purpose.
Never underestimate the forces at play. Always over-engineer your solution. If your planter weighs 20 lbs wet, use hardware rated for at least 60 lbs. This 3x safety factor accounts for the dynamic force of wind and provides peace of mind for you, your property, and your neighbors below.
Your Action Plan: Hardware Selection by Ceiling Type
- For concrete ceilings: Use expansion anchors or concrete screws that are rated for at least three times the wet weight of your planter.
- For wood joists: Install heavy-duty lag bolts directly into the center of the structural beams. Never anchor into drywall or plywood sheathing alone.
- For metal frameworks: Use heavy-duty, rated C-clamps or beam clamps. For added security, always incorporate a secondary safety cable or chain as a backup.
- For renters (no-drill solution): Investigate robust tension rod systems designed for heavy loads (not shower curtains) or use weighted cantilever stands that don’t rely on ceiling support.
- Final Check: Regardless of the method, always add a secondary safety cable as a redundant backup support. It’s a small step that prevents a catastrophic failure.
Drip Irrigation for Hanging Baskets: Stopping the ‘Drip on Neighbors’
Wind is a thief of moisture. It accelerates evaporation from leaves and soil, meaning high-rise hanging baskets dry out exponentially faster than their ground-level counterparts. The common response—watering more frequently by hand—is inefficient and creates a significant problem in vertical living: runoff. Excess water dripping onto your neighbor’s balcony below is a common source of conflict. A far more elegant and practical solution is a closed-loop or high-efficiency drip irrigation system.
A DIY drip system can be tailored perfectly to a vertical garden. The concept is simple: a network of thin tubing delivers water directly to the base of each plant, minimizing evaporation and eliminating wasteful overflow. A timer-controlled system ensures consistent moisture without daily intervention, a key to resilience when you’re away. For an even more contained setup, some gardeners create clever systems using PVC pipes with small holes drilled along their length, which are installed in the planters before the soil and plants. This sub-irrigation method delivers water directly to the root zone from within.
The key to neighborly harmony is managing the “drip.” This is achieved by using pressure-compensating drippers that release water slowly, allowing the soil to absorb it fully. Paired with a deep saucer or an internal reservoir at the bottom of the pot, you can capture any minor excess, creating a self-contained watering loop. This thoughtful approach to water management is a hallmark of a well-engineered balcony ecosystem.
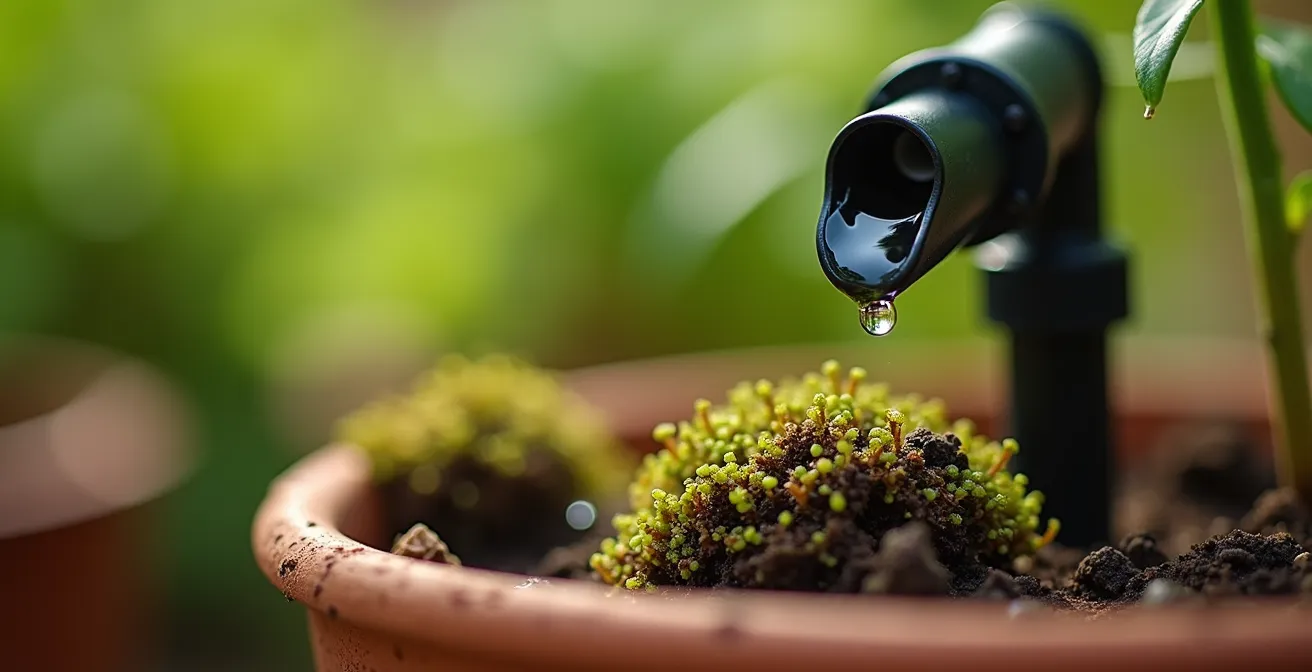
As you can see in this setup, the focus is on precision. Small emitters deliver water directly to the soil, and polymer moisture crystals (visible as translucent specks) can be mixed in to retain water for longer periods. This combination of targeted delivery and enhanced retention is the most effective way to keep plants hydrated while respecting the shared space of a multi-story building.
Ferns vs Succulents: Which Plants Survive 10th Floor Winds?
The debate between lush ferns and hardy succulents is common for balcony gardeners, but on a high-rise, the winner is determined by physics, not just aesthetics. While a delicate fern might look beautiful, its large, frond-like leaves act like sails, catching the wind and leading to shredding and rapid dehydration. Succulents, with their compact forms, waxy coatings, and minimal leaf surface area, are aerodynamically superior. They present a much smaller profile to the wind, reducing drag and moisture loss.
However, the choice isn’t limited to succulents. The key is to look for specific physical traits that signal resilience. As the experts at Green Shack Gardening point out, true wind tolerance comes from a plant’s structure.
Wind resistant plants generally have flexible stems which allow them to bend in the breeze, strong root systems which enable them to stay anchored, and often have narrow leaves.
– Green Shack Gardening Experts, High Rise Balcony Gardening Guide
This principle is your best guide. Instead of asking “Is this plant wind-tolerant?”, ask “Does this plant have flexible stems, a robust root system, and small or narrow leaves?” Ornamental grasses like Blue Fescue, for example, are masters of this, bending and swaying without breaking. Plants with fine, needle-like foliage such as Rosemary or Juniper also allow wind to pass through them with minimal resistance. Therefore, while succulents are an excellent default choice due to their low water needs and sturdy build, they are part of a larger category of structurally resilient plants. A fern is the opposite: its structure is optimized for capturing light in a still understory, not for deflecting wind on a skyscraper.
How to Stagger Heights to Create a ‘Green Curtain’ Effect?
A vertical garden is more than just a storage system for plants; it’s a design feature. One of the most impactful designs for a balcony is the “green curtain,” a dense, multi-layered wall of foliage that provides privacy, softens hard architectural lines, and creates the feeling of an immersive oasis. Achieving this effect requires a strategic approach to plant placement, not a random arrangement. The key is to think in three dimensions and stagger your planters both vertically and by depth.
The classic “Thriller, Filler, Spiller” method used in container gardening is perfectly adapted for this vertical application. By assigning a role to each horizontal tier of your garden, you create a composition that is visually balanced and dynamic.
- Top Tier (Thrillers): At the highest level (around 6-8 feet), place your tall, upright plants. These are the dramatic focal points. Think ornamental grasses, dwarf bamboo, or even a climbing vine trained upwards.
- Middle Tier (Fillers): This is the visual bulk of your curtain, at eye level (3-5 feet). Use bushy, mounding plants like Geraniums, Coleus, or Petunias to fill out the space and add color and mass.
- Bottom Tier (Spillers): At the lowest hanging point (1-2 feet), position your trailing plants. Ivy, String of Pearls, or trailing Petunias will cascade downwards, connecting the different levels and softening the edges of the planters.
Beyond this tiered approach, varying the depth of the planters can create a forced perspective, making the space feel larger. Place larger planters with coarse-textured plants closer to the front, and smaller, finer-textured plants towards the back. A successful transformation, like one case study using a simple pallet board with pots hung at various heights, shows that even simple materials can create significant vertical growing space. Crucially, remember to leave a few strategic “windows” in your green curtain to allow light to penetrate deeper and to frame pleasant views, rather than blocking them entirely.
The Liner Trick to Keep Soil from Blowing Away in Storms
You’ve secured your planters and chosen your plants. But during the first major storm, you might face a new problem: soil erosion. High winds don’t just batter leaves; they can scoop potting mix right out of your hanging baskets, leaving roots exposed and making a mess on your balcony floor. While traditional plastic liners help with water retention, a different kind of “liner” is needed to protect the soil surface. The solution involves weight and cover.
The simplest method is to apply a heavy top-dressing. After planting, gardening experts recommend that adding a 1-2 inch layer of heavy material like pea gravel, decorative river stones, or even crushed shells is highly effective. This layer acts as a physical barrier, weighing down the lightweight potting mix and preventing it from becoming airborne. It also has the added benefit of reducing surface evaporation and suppressing weeds.
An even more integrated and beautiful solution is to use a “living mulch.” This involves planting a dense, low-growing groundcover plant around the base of the main plant in your container. Creeping Thyme, Sedum, or even certain types of moss can form a thick mat over the soil surface.
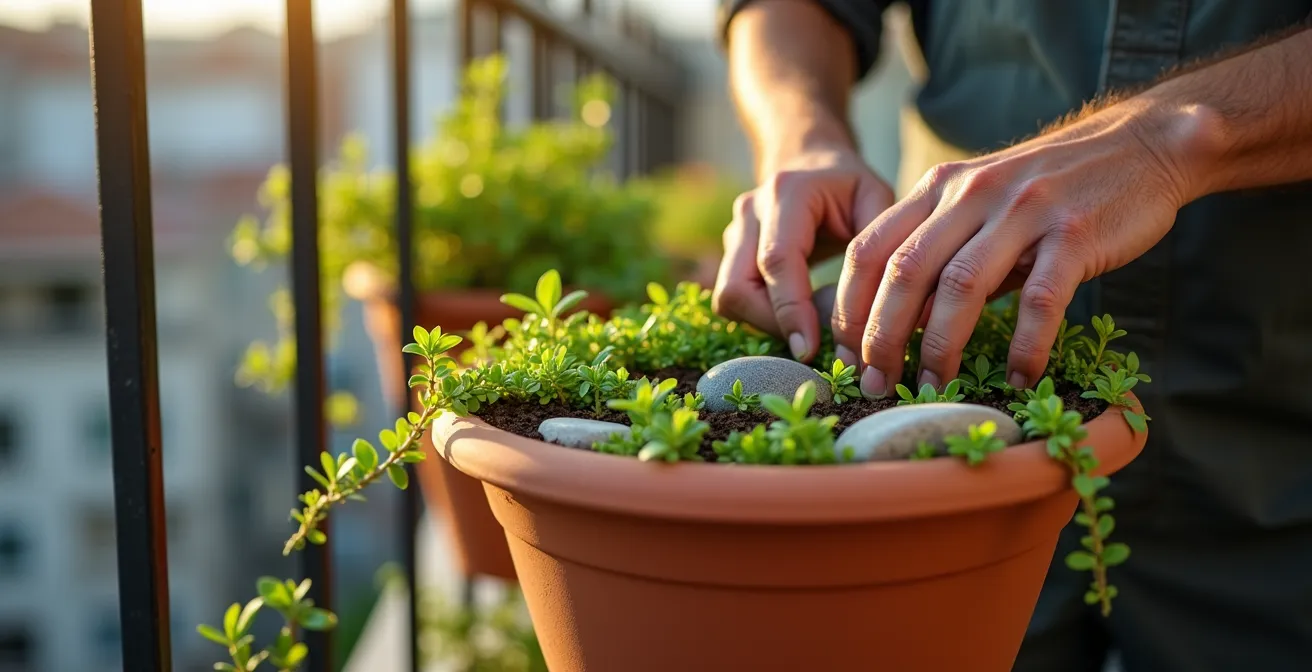
This living layer offers multiple benefits. Its root system helps bind the soil together, while its foliage physically shields the soil from the wind and reduces the impact of heavy rain. As seen here, the careful placement of a groundcover like creeping thyme not only protects the soil but adds another layer of texture and interest to the container, turning a practical necessity into a design element. This approach truly embodies the idea of creating a resilient, self-sustaining micro-ecosystem in each pot.
How to Exploit Vertical Space to Double Your Storage Capacity?
The most significant advantage of vertical gardening is its incredible efficiency. For an apartment dweller with a tiny balcony, floor space is the ultimate luxury. By thinking upwards instead of outwards, you can dramatically multiply your growing area without increasing your footprint. The math is compelling; vertical gardening calculations demonstrate that a tiny 2 sq ft footprint can become a 12 sq ft garden with just six vertical layers. This isn’t just about adding a few pots; it’s about transforming your capacity.
To truly maximize this potential, think beyond a static setup and embrace a modular system. A freestanding vertical tower with removable pot slots, or a wall-mounted rail system, allows you to treat your garden like a living library. You can swap plants in and out with the seasons, ensuring your balcony is vibrant year-round, not just for a few months in the summer. This approach turns your vertical garden into a dynamic, high-capacity production zone.
A modular seasonal swap system is the key to maximizing this capacity. It requires a bit of planning but pays off with continuous color and interest. Here’s a practical workflow:
- Install a system with removable pots: This is crucial for easy swapping without disturbing the entire structure.
- Create a seasonal rotation calendar: Mark the ideal swap dates for your climate zone.
- Spring: Fill upper tiers with cool-weather bloomers like pansies and primrose.
- Summer: As heat arrives, swap in sun-loving petunias, calibrachoa, and herbs.
- Fall: Replace tired summer annuals with ornamental kale, chrysanthemums, and trailing ivy.
- Winter: For year-round structure, insert small evergreen arrangements or simply bring tender pots indoors for storage.
By maintaining a small “nursery” of backup plants in inexpensive pots, you can perform these swaps in minutes, ensuring your vertical garden is always at peak performance and maximizing every square inch of available space.
Key Takeaways
- A high-rise garden is an engineered system; prioritize structural safety and wind dynamics over simple plant choice.
- Effective water and soil management through drip irrigation and top-dressing is non-negotiable for plant survival and neighborly peace.
- Choose plants based on their physical structure (flexible stems, narrow leaves) to ensure they can withstand the forces of a windy environment.
Why You Shouldn’t Amend Soil When Planting Natives?
There’s a persistent piece of advice in traditional gardening: when planting natives, use the native soil to make them feel “at home.” This is a dangerous myth when applied to container gardening. A hanging planter on a balcony is a completely artificial environment, and the soil within it must be engineered to compensate for the lack of natural processes found in the ground. Using heavy, dense garden soil is one of the quickest ways to kill a container plant, native or not.
The soil in a container has three primary jobs that ground soil doesn’t have to worry about in the same way: providing perfect drainage in a closed system, ensuring proper aeration for roots in a confined space, and retaining just enough moisture without becoming waterlogged. Standard topsoil or garden loam fails on all counts. It compacts quickly, chokes out roots, and holds far too much water, leading to root rot. As the team at Balcony Garden Web correctly states, the container itself dictates the soil rules.
A container is an artificial ecosystem that requires amended soil to provide drainage, aeration, and nutrients that would otherwise be naturally available in the ground.
– Balcony Garden Web Editorial Team, Container Gardening Best Practices
So, what should you use? The answer is a high-quality, lightweight potting mix, which is a blend of ingredients like peat moss, coir, perlite, and vermiculite. This is your starting point. From there, you can amend this mix to suit the *type* of native plant. For a prairie native that loves dry conditions, you would add more sand or fine gravel to increase drainage. For a woodland native that prefers consistent moisture, you would incorporate more compost or fine bark to improve water retention. The goal is to mimic the *properties* of the native soil (e.g., fast-draining), not to use the soil itself.
Design Hacks for Compact Urban Courtyards: Creating an Oasis in 200 Sq Ft
While our focus has been on the engineering of a vertical garden, the final step is to elevate it from a functional setup to a true sensory oasis. Even on a tiny 200 sq ft balcony, you can create a rich, immersive experience by designing for all five senses, not just sight. Your vertical structure provides the perfect framework for layering these sensory elements at different heights, turning your “green curtain” into an interactive experience.
This multi-sensory approach transforms the space from a collection of plants into a place you want to inhabit. By strategically positioning plants and other elements, you can curate a specific atmosphere. A successful example involved putting up a simple lattice wall to hang planter boxes; this not only provided vertical space but allowed the gardener to strategically place plants to frame views and create distinct visual and sensory zones. Here is a checklist to guide your multi-sensory design:
- Smell: Position fragrant herbs like rosemary, mint, or lavender at nose level (around 4-5 feet) where their scent will be released as you brush past them.
- Sound: Install wispy ornamental grasses at ear level. Their rustling in the breeze provides a soothing natural soundtrack. You can supplement this with a small, subtle wind chime.
- Touch: Place plants with interesting textures, like the velvety leaves of Lamb’s Ear or the smooth, cool surfaces of certain succulents, within arm’s reach along a path or near seating.
- Sight: Use your vertical garden to frame desirable views while blocking unwanted sightlines (like a neighbor’s air conditioning unit). Create distinct sun and shade zones to add visual complexity.
- Taste: Incorporate edible elements like cherry tomatoes, strawberries, or a variety of herbs in your hanging planters for a garden that is both beautiful and productive.
By thinking of your balcony as a multi-layered stage, you can use your vertical garden to direct the experience. This thoughtful design is what ultimately transforms a compact urban courtyard from a simple outdoor space into a genuine, restorative oasis.
Now that you have the blueprint for an engineered, resilient, and beautiful vertical garden, the next step is to begin the planning process for your own unique space. Start by assessing your ceiling structure and taking measurements to build a system that will last for years to come.
Frequently Asked Questions About Vertical Balcony Gardening
Should I use native soil in containers for native plants?
No, containers require amended soil for proper drainage and aeration that ground soil cannot provide, even for native plants. A container is an artificial ecosystem that needs a lightweight, fast-draining potting mix as a base.
How do I match soil amendments to native plant types?
For prairie natives that thrive in dry conditions, amend your potting mix with sand and gravel to enhance drainage. For woodland natives that prefer more moisture, incorporate compost and fine pine bark to help retain water.
Can I use ‘climate cousin’ plants instead of local natives on high balconies?
Yes, this is an excellent strategy. Plants native to other harsh, windy environments like alpine regions or coastal cliffs often perform much better on an exposed high-rise balcony than plants native to the sheltered lowlands of your local area.