The most durable entryway flooring is not the hardest material, but the one with the lowest Total Cost of Ownership (TCO) once you factor in replacement, maintenance, and system failure.
- Scientific metrics like DCOF (slip resistance) and AC ratings (laminate wear) are far better predictors of performance than a material’s price tag.
- Most “flooring failures” are actually system failures: porous grout that stains, or an improperly prepared subfloor that causes cracks and movement.
Recommendation: Prioritize testing samples ruthlessly and calculating the long-term cost over a 10-20 year period, rather than focusing solely on the initial per-square-foot price.
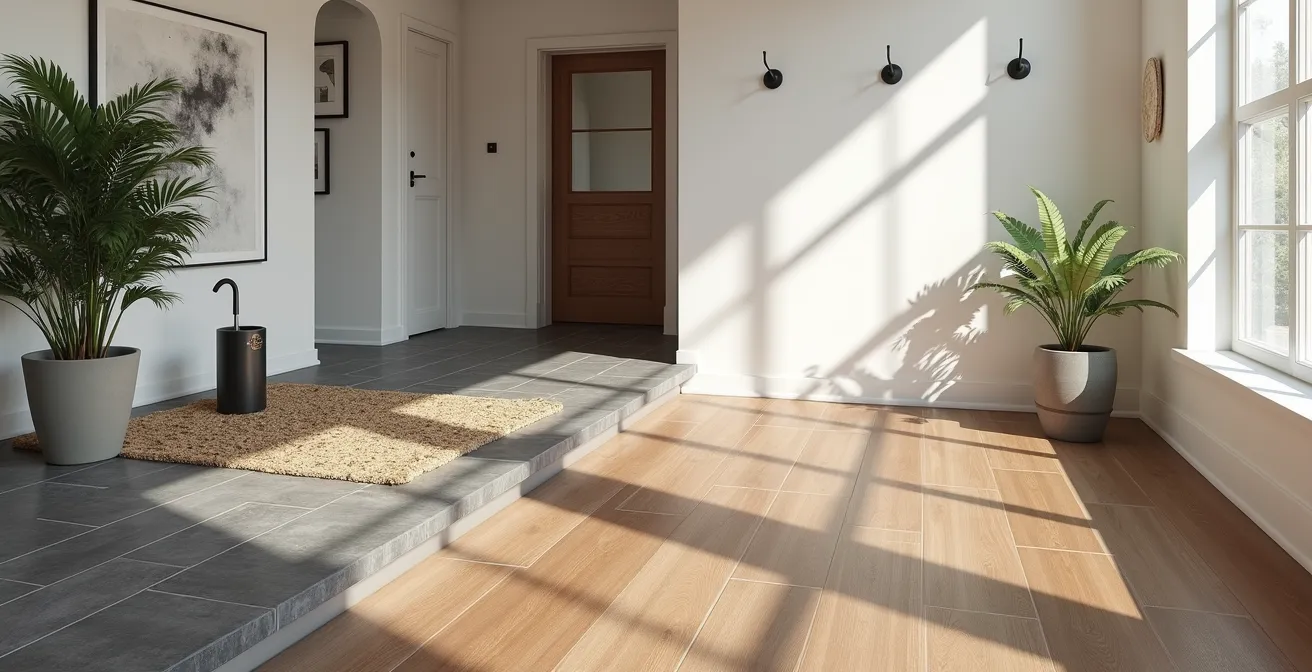
For any family with children, pets, or a penchant for outdoor activities, the entryway is a war zone. It’s the first line of defense against mud, melting snow, abrasive grit from boot treads, and constant, heavy foot traffic. The common advice is often to just “choose a durable material,” but this vague guidance leads to costly mistakes. You might select a beautiful tile, only to watch the grout become permanently stained within a year, or opt for a “budget-friendly” laminate that scratches and swells, requiring a full replacement far sooner than anticipated.
The conventional wisdom focuses on the surface material in isolation. But a true materials consultant knows that durability is a system. It involves the material’s inherent properties, the quality of the installation, the integrity of the subfloor, and a realistic assessment of maintenance over time. The most expensive mistakes are often made by underestimating these interconnected factors. You might be surprised to learn that a seemingly high-end material like slate can, in some scenarios, be more economical over a decade than the cheapest laminate on the market.
This guide departs from simple aesthetic advice. We will analyze your entryway flooring options through the lens of a materials engineer, focusing on scientific performance metrics and the total cost of ownership. We will dissect why certain materials fail, how to test them before you buy, and how to build a complete flooring system—from subfloor to sealant—that is truly built to last. It’s not about finding a cheap floor; it’s about making a smart, long-term investment that can genuinely withstand the rigors of family life.
This article provides a comprehensive analysis, breaking down the crucial factors that determine the long-term success of your entryway flooring. Explore the full table of contents below to navigate through the key considerations, from long-term cost analysis to safety metrics for your family.
Summary: A Consultant’s View on High-Traffic Entryway Flooring
- Why Cheap Laminate Costs You More in the Long Run Than Slate?
- How to Scratch-Test Flooring Samples Before Buying?
- Porcelain Tile vs Luxury Vinyl: Which Survives Melting Snow Boots?
- The White Grout Mistake in Mudrooms: Why You Will Regret It
- When to Reseal Natural Stone: The Water Droplet Test
- Why Smooth Tiles Are a Hazard in Kitchens and Bathrooms?
- Why Your Patio Is Sinking: The Importance of Compaction
- Textured Flooring vs Smooth Finish: Which Is Safer for Families with Toddlers?
Why Cheap Laminate Costs You More in the Long Run Than Slate?
The appeal of cheap laminate is its low initial price tag, often between $1 to $5 per square foot. It seems like a cost-effective solution for a high-traffic area. However, this view ignores the Total Cost of Ownership (TCO), a critical metric for any long-term investment. Standard laminate flooring has a typical lifespan of 15-25 years, but in a demanding entryway, exposure to moisture, grit, and impact can drastically shorten this. You may find yourself facing a full replacement in under a decade. When you factor in the cost of labor and disposal, which can be as much as the material itself, the financial picture changes.
Consider the cost of a single replacement. The average flooring replacement can run upwards of $12.50 per square foot when you include removal of the old floor, subfloor prep, and new installation. If you have to do this twice over a 30-year period, your “cheap” laminate has suddenly become a significant recurring expense. Even modern laminate with higher durability (an AC4 rating) that might last over 30 years still presents a risk with its seams, which are vulnerable to water ingress from melting snow or wet boots.
Conversely, natural stone like slate, while having a higher initial material cost of $6-12 per square foot, offers a lifespan that is measured in generations, often 50 years or more. When properly sealed, it is highly resistant to water and abrasion. The TCO of slate, amortized over 30 years, can be significantly lower than that of two or three generations of laminate flooring. The initial investment is higher, but the cost per year of service is fractional. This is the fundamental miscalculation many homeowners make: confusing a low price with good value. In a high-wear environment, the most “expensive” material is often the one you have to replace the most frequently.
How to Scratch-Test Flooring Samples Before Buying?
Manufacturer durability ratings are a good starting point, but they don’t replicate the unique types of abuse your family will inflict on an entryway floor. To avoid a costly mistake, you must become a materials tester. Procuring oversized samples—at least 12×12 inches—is the first step. This allows you to perform a series of real-world simulations that go beyond a simple visual inspection. Your goal is to assess three key failure points: scratching, staining, and impact resistance.
Create a testing protocol. For scratching, don’t be gentle. Use a variety of tools that mimic real life: the edge of a house key, a quarter, and even the screw head from a piece of furniture. Drag them across the surface with varying degrees of pressure. This will reveal the difference between a durable wear layer and a purely decorative finish. For staining, apply common entryway culprits: a dab of mud, a drop of coffee, and a smear of grease from a bike chain. Let them sit for an hour before cleaning to see if any residue or discoloration remains. Finally, test for impact by dropping a heavy object like a soup can from waist height to check for chipping or denting, especially on tile and laminate.
This hands-on testing provides invaluable data that no brochure can offer. It allows you to move beyond marketing claims and make a decision based on empirical evidence of how a material will perform in your specific home. The visual results of these tests are often the most compelling argument for or against a particular product.
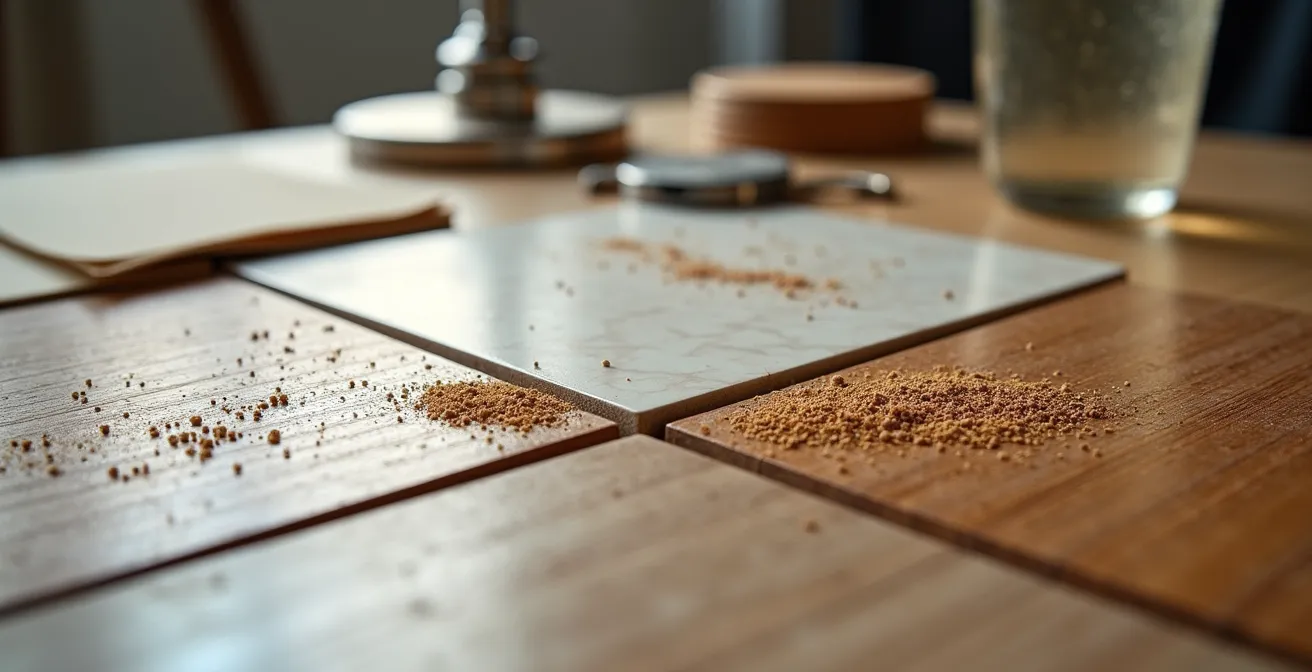
As this visualization of a test bench shows, different materials respond dramatically differently to the same stress. Observing how a key scratch affects laminate versus luxury vinyl, or how a water droplet beads on sealed porcelain, provides more insight than a thousand words in a product description. This is the level of due diligence required for a space as critical as an entryway.
Porcelain Tile vs Luxury Vinyl: Which Survives Melting Snow Boots?
When it comes to handling the daily deluge from wet boots and umbrellas, porcelain tile and Luxury Vinyl Tile/Plank (LVT/LVP) are two of the top contenders. Both are marketed as “waterproof,” but their performance and failure modes differ significantly under the pressures of a high-traffic entryway. From a materials science perspective, porcelain tile is the champion of water resistance. Its composition is incredibly dense and non-porous, meaning water simply cannot penetrate the tile itself. Its primary vulnerability lies not in the tile, but in the grout lines between them, which are porous by nature and can absorb water and dirt unless properly and regularly sealed.
Luxury vinyl, on the other hand, is also highly water-resistant. Its synthetic composition makes it impervious to moisture on its surface. However, its weak point is mechanical: the seams. Whether it’s a click-lock or glue-down system, these seams represent potential ingress points for water. If a large puddle from melting snow is left to sit, it is possible for moisture to work its way between the planks or tiles, potentially reaching the subfloor and causing damage over time. That being said, modern LVT offers a distinct advantage in comfort and safety.
Luxury vinyl flooring is not as slippery as other materials, and that additional traction can be very welcome when putting on or taking off wet shoes.
– The Tile Shop, Ultimate Guide to the Best Entryway Flooring
The choice between them often comes down to a trade-off between absolute water impermeability and other factors like comfort, ease of installation, and seam integrity. The following table breaks down the key performance characteristics to help you make a data-driven decision.
| Feature | Porcelain Tile | Luxury Vinyl (LVT/LVP) |
|---|---|---|
| Water Resistance | Unbeatable water resistance | Water-resistant, excellent for spills and muddy boots |
| Weak Point | Grout lines (porous unless sealed) | Click-lock or glue-down seams |
| Lifespan | 50+ years | May need replacement more frequently than porcelain, timespan still in decades with better care |
| Comfort | Harder underfoot | Softer underfoot, added comfort |
| Installation | Professional recommended | Click-lock system easy for DIYers |
The White Grout Mistake in Mudrooms: Why You Will Regret It
Choosing white or light-colored grout for an entryway or mudroom floor is one of the most common and regrettable design mistakes a homeowner can make. From a materials science perspective, standard cementitious grout is essentially a porous, concrete-based product. It acts like a microscopic sponge. While a high-quality sealer can provide temporary protection, the sheer volume of dirt, muddy water, and de-icing salts in a high-traffic entryway will inevitably overwhelm it. The result is grout lines that become permanently discolored, dingy, and impossible to clean, creating a grid of grime that undermines the beauty of your tile.
The issue is not just aesthetic; it’s also about maintenance. Homeowners find themselves on their hands and knees, scrubbing with harsh chemicals in a futile attempt to restore the original color. Grout pens and re-colorants offer a temporary fix but tend to flake and wear away quickly under foot traffic, creating an even patchier and more unsightly appearance. The belief that “I’ll just clean it regularly” vastly underestimates the persistent and abrasive nature of entryway dirt.
The only winning move is to not play the game. Instead of fighting a losing battle against discoloration, the solution is to design for reality. This means selecting a grout that is inherently resistant to staining and choosing a color that strategically masks the inevitable dirt. Modern epoxy or urethane grouts are a significant upgrade over traditional cement-based products. They are non-porous and chemically resistant, meaning dirt and water sit on the surface rather than soaking in. Paired with a dark-colored grout (charcoal, dark gray, or a shade that matches the darkest tones in your tile), you create a floor that is not only more durable but also infinitely more forgiving and low-maintenance.
Action Plan: Grout Selection for High-Traffic Areas
- Specify the Right Material: Choose epoxy or urethane grout over standard cementitious options for their non-porous, stain-resistant properties.
- Select a Strategic Color: Opt for dark colors like charcoal, dark gray, or deep brown to effectively mask the inevitable accumulation of dirt and grit.
- Seal Immediately and Correctly: Even with better grout, apply a professional-grade penetrating sealer immediately after installation and curing to maximize protection.
- Avoid Temporary Fixes: Do not rely on grout pens or colorants for maintenance; they are not durable enough for floor traffic and will flake, worsening the appearance.
- Budget for Professional Care: Factor in the cost of an annual professional deep cleaning and re-sealing to maintain the integrity of the grout and tile over the long term.
When to Reseal Natural Stone: The Water Droplet Test
Natural stone floors, such as slate, travertine, or limestone, bring unparalleled beauty and durability to an entryway. However, their performance is critically dependent on the integrity of their sealant. Most natural stones are porous to some degree, and it’s the sealer’s job to create an invisible, protective barrier that prevents water, oil, and dirt from penetrating the surface and causing stains. Over time, this sealer wears down due to foot traffic and cleaning. Resealing is not a one-time task but a regular maintenance requirement, and the frequency depends entirely on the level of traffic and the specific type of stone.
Instead of guessing or adhering to a generic calendar schedule (e.g., “reseal every year”), you can use a simple, effective diagnostic tool: the water droplet test. This test gives you a direct, visual indication of your sealer’s current performance. To perform the test, simply pour a small amount of water, about the size of a quarter, onto the most heavily trafficked area of your stone floor. Now, observe it for the next 15-20 minutes.
The behavior of the water tells you everything you need to know. If the water beads up tightly, forming a convex dome on the surface, your sealer is in excellent condition and no action is required. If the water spreads out slightly but doesn’t absorb, the sealer is beginning to wear but is still functional. However, if the water droplet quickly flattens, spreads out, and begins to darken the stone as it gets absorbed, it’s a clear and urgent sign that your sealer has failed. The stone is now vulnerable to staining and moisture damage, and it is time to clean it thoroughly and reapply a high-quality sealer.
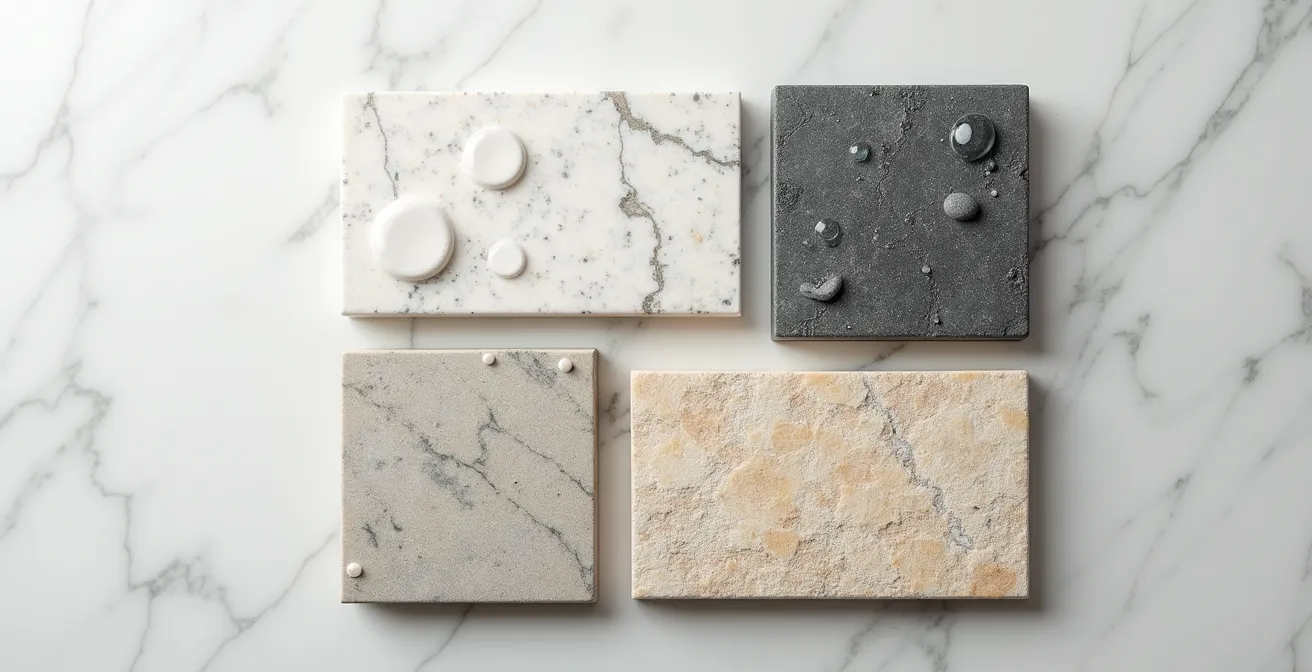
As the image demonstrates, a well-sealed surface forces water to bead up, while a worn or unsealed surface allows it to soak in. This simple, non-destructive test removes all guesswork from your maintenance routine, ensuring you protect your investment in natural stone by resealing it precisely when it’s needed.
Why Smooth Tiles Are a Hazard in Kitchens and Bathrooms?
The same principles of floor safety that apply to wet areas like kitchens and bathrooms are critically important in an entryway, which is frequently exposed to rain, snow, and wet footwear. A smooth, polished tile that looks beautiful in a dry showroom can become a dangerous slipping hazard the moment it gets wet. The measure of a tile’s slip resistance is a scientific metric known as the Dynamic Coefficient of Friction (DCOF). This value quantifies the traction a surface provides when in motion. It’s the most important safety specification to consider for any floor that will be walked on when wet.
Industry standards are clear and based on extensive safety research. According to tile industry regulations, ANSI A137.1 requires tile flooring products to have a DCOF of 0.42 or greater if they are to be used in level interior spaces that are expected to be walked upon when wet. A tile with a DCOF rating below this threshold is not suitable for entryways, bathrooms, or kitchens. Unfortunately, this crucial data point is often buried in technical spec sheets and overlooked in favor of aesthetics. High-gloss, polished porcelain or ceramic tiles often have a DCOF rating well below 0.42, making them an active liability in a family home.
The risk is not theoretical. As experts from Solidshape, a resource for luxury building materials, note, everyday situations can create treacherous conditions: “Kitchen floors near sink or stove can become slippery due to spills and splashes. Cooking grease, water, and other liquids create hazardous conditions.” The same is true for an entryway where someone might rush in from the rain. Choosing a tile with a matte, textured, or otherwise slip-resistant finish that meets or exceeds the 0.42 DCOF standard is not a mere suggestion; it is a fundamental requirement for ensuring the safety of your family and guests. Prioritizing aesthetics over this critical safety metric is a risk no homeowner should take.
Why Your Patio Is Sinking: The Importance of Compaction
While the title refers to a patio, the underlying engineering principle is directly and critically relevant to the longevity of your interior entryway floor: the stability of the substrate is everything. Just as a poorly compacted base causes patio pavers to sink and shift, an uneven, weak, or improperly prepared subfloor will doom even the most expensive entryway flooring. Tile will crack, grout will crumble, and laminate or vinyl will develop soft, bouncy spots. The flooring material itself is rarely the first point of failure; it’s the foundation beneath it.
Before any new flooring is installed, a thorough diagnostic of the subfloor must be performed. This involves checking for three key issues: levelness, deflection, and moisture. The floor must be flat; a common industry standard is no more than a 3/16-inch dip over a 10-foot span. Any low spots must be filled with a self-leveling compound. Deflection, or “bounce,” indicates a lack of structural rigidity, which is fatal for tile installations. This must be addressed by reinforcing the floor joists or adding another layer of plywood. Finally, moisture content must be within an acceptable range to prevent mold growth and material swelling.
Ignoring these foundational issues to save time or money is the definition of a false economy. The cost to repair or replace a subfloor after the fact is exorbitant, often costing $3-10 per square foot for removal and replacement, in addition to the cost of replacing the ruined finish flooring. A high-quality flooring installation is not about the material you see; it’s about the meticulous preparation of the layers you don’t. Ensuring your subfloor is perfectly flat, rigid, and dry is the most important investment you can make in the durability of your entryway.
Key Takeaways
- Prioritize Total Cost of Ownership: A higher initial investment in a durable material like slate or high-grade tile often results in a lower cost per year of service compared to replacing cheaper laminate multiple times.
- Test Samples Like a Scientist: Do not trust marketing claims alone. Perform real-world scratch, stain, and impact tests on oversized samples to see how they will actually perform in your home.
- Durability is a System, Not Just a Surface: The weak points are often the grout and the subfloor. A non-porous epoxy grout and a perfectly prepared subfloor are as important as the tile itself.
Textured Flooring vs Smooth Finish: Which Is Safer for Families with Toddlers?
For families with young children, flooring selection moves beyond durability and enters the critical realm of safety. The choice between a textured and a smooth finish is a balancing act between providing sufficient traction for unsteady toddlers and ensuring the surface isn’t so abrasive that it’s uncomfortable for crawling or creates cleaning nightmares. The key, once again, lies in the DCOF rating. A textured surface will almost always have a higher DCOF rating than a smooth one, providing essential slip resistance for wet or socked feet.
However, “texture” is a broad term. A floor with a very aggressive, rough texture that provides maximum traction might be uncomfortable or even abrasive for a baby’s sensitive knees and hands during the crawling phase. Conversely, a floor that is too smooth poses a clear slipping hazard for a toddler learning to walk and run. The ideal solution is a material with a “micro-texture” or a matte finish. These surfaces provide a DCOF rating well above the 0.42 safety minimum without creating a rough, hard-to-clean surface profile. They offer a good grip for little feet without punishing little knees.
It’s also crucial to think about the flooring’s entire lifecycle within the family. A heavily textured floor that is great for a toddler might become a tripping hazard or difficult for a wheelchair or walker to navigate for an aging family member years later. Therefore, a moderate texture provides the best long-term balance of safety and accessibility. The following table illustrates the trade-offs at different levels of texture, guided by DCOF ratings.
| Surface Type | DCOF Rating | Pros | Cons |
|---|---|---|---|
| Polished Tile | Below 0.42 | Easy to clean | Low slip resistance |
| Matte Finish | 0.42 or greater recommended for moisture areas | Good balance | Moderate cleaning effort |
| Heavily Textured | 0.60 or greater for high-risk areas | Maximum traction | Difficult to clean |
Ultimately, a matte or lightly textured finish with a DCOF rating between 0.42 and 0.60 represents the sweet spot for most family homes, providing a safe environment for toddlers without compromising too much on cleanability or future accessibility.
To make a truly informed and cost-effective decision for your home’s entryway, your next step is to apply this system-based analysis. Begin by acquiring samples of your top choices and implementing the testing protocols outlined here to gather your own performance data.
Frequently Asked Questions about Family-Safe Entryway Flooring
What DCOF rating is safe for families with toddlers?
For any level interior floor that could get wet, such as an entryway, the absolute minimum required DCOF slip resistance rating is 0.42. For maximum safety for unsteady toddlers, aiming for a slightly higher rating in the 0.45 to 0.60 range is advisable.
Can textured flooring be too rough for crawling babies?
Yes, it is a valid concern. Heavily textured surfaces, like some types of slate or deeply grooved tile, can cause skin abrasions on the knees and hands of crawling babies. It’s best to choose a micro-texture or matte finish that provides grip without being overly abrasive.
What about aging family members?
This is a crucial consideration for “aging in place.” A floor that is safe for a toddler may not be safe for an elderly person. For example, a very heavy texture that provides great grip can create a tripping hazard or make it difficult to maneuver a walker. A moderate, non-polished texture often provides the best balance of safety for all age groups.